’ve been a funnel strategist for years and while I don’t build funnels for clients anymore, I’m still very much connected to the world of sales funnels. The one problem I see? Sometimes we are just overcomplicating the sales funnel creation process! Creating a sales funnel quickly and efficiently is essential for businesses aiming to increase their online presence and sales. Simplifying your tools can streamline this process in a major way, making it totally doaible even for beginners.
This blog post will guide you through creating a quick funnel using three powerful tools:Thrivecart, Marketing Magic App, and Drip. These tools will help you set up your offer, craft compelling copy, and automate your email sequences, ensuring a smooth journey for your potential customers from awareness to purchase.
Understanding the Basics of a Quick Sales Funnel
A sales funnel is the journey a potential customer goes through, from first learning about your business to making a purchase. It's crucial for converting leads into customers. The right tools can make this process simpler and more effective, allowing you to focus on what you do best – growing your business.
Tool 1: Setting Up Your Offer with Thrivecart
Step 1: Start by creating a $0 product in Thrivecart for your freebie.
This could be an ebook, a mini-course, or any other digital product that provides value to your potential customers. Snag some of my templates inside the Thrivecart Template Shop to make this process even faster.
Step 2: Consider adding a bump offer or an upsell in Thrivecart.
Tool 2: Crafting Your Copy with Marketing Magic App
Step 3: Use the Marketing Magic App to generate all the copy you need for your opt-in pages, thank you pages, and emails.
Struggling with the right copy for your sales funnel? This AI-powered tool can save you hours of work and ensure your copy is optimized for conversions.
Click here to see behind the scenes of how I use it and how awesome it really is! Plus, you can grab a free trial to test it out yourself.
Tool 3: Automating Email Sequences with Drip
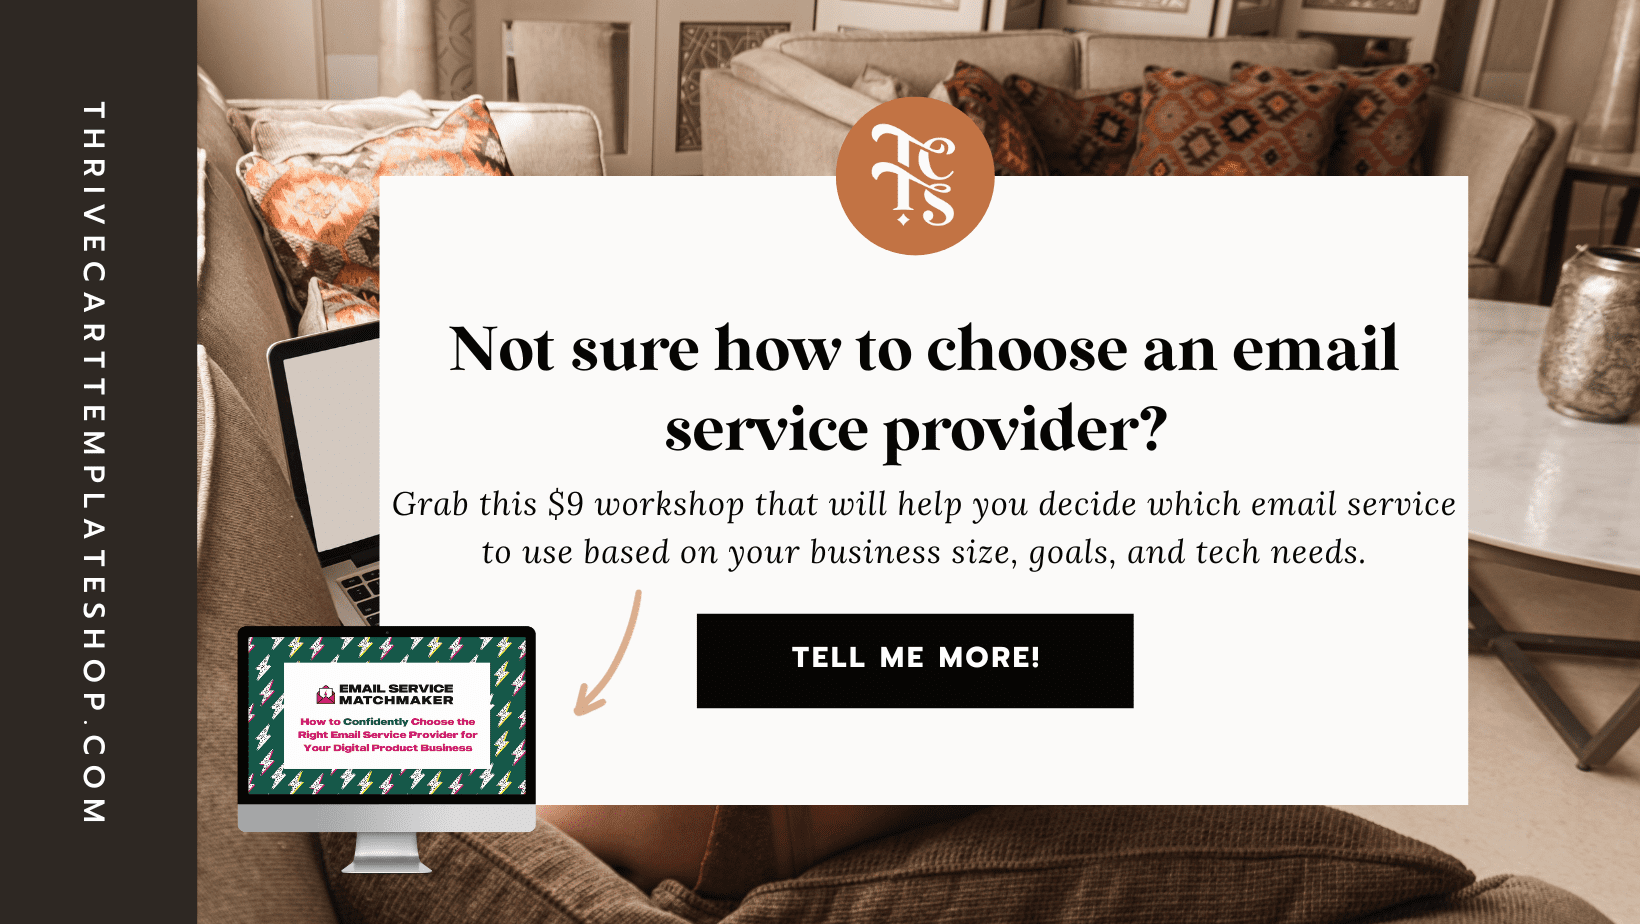
Okay, so you don’t have to use Drip as your email marketing provider. I do and I love it, but it’s not the right choice for everyone’s needs. Click here to check out Email Service Matchmaker if you aren’t sure about the email platform you’re currently using.
Step 4: Connect Thrivecart to Drip using Thrivecart behaviors.
This integration allows you to automate the delivery of your freebie and the follow-up communications, making your funnel run smoothly without constant supervision.
Step 5: Set up your email workflow and sequence in Drip.
This should include a series of emails that nurture your leads, provide additional value, and guide them toward making a purchase.
Optimizing and Refining Your Funnel
Anytime I talk about funnels, I can’t not talk about this: they aren’t a ‘set it and forget it’ type of thing. It's important to monitor your funnel's performance and make improvements based on the data you collect. Watch your stats in both Thrivecart and Drip to see where you can optimize your funnel for better conversions.
Final Thoughts
Creating a sales funnel doesn't have to be complicated. By following these steps and leveraging the power of Thrivecart, Marketing Magic App, and Drip, you can set up a simple yet effective funnel that guides potential customers through the buying process.
Remember, the goal is to make it as easy as possible for people to learn about and purchase your products or services. With these tools, you're well on your way to achieving that goal.
Need more clients or customers? Want to grow your email list? Let’s talk growing your email list with lead funnels and how they can have a massive impact on your business. As an entrepreneur and funnel strategist myself, I know the importance of generating quality leads — growing my network of interested folks for my offers —and converting them into loyal customers. That's where lead funnels come into play!
In this ultimate guide, I will walk you through everything you need to know about lead funnels and how they can work for you.
Why Lead Funnels Are Important for Businesses
All businesses need a systematic approach to attract and nurture leads. For me personally, that means growing my email list as that’s the number one way I engage with folks in my community, share value, spotlight my offers, and make sales of my digital products. Lead funnels serve as a roadmap, guiding potential customers through the buying process. They allow you to build relationships, showcase your expertise, and ultimately turn leads into paying customers.
Without a well-designed lead funnel, your marketing efforts may be scattered, resulting in missed opportunities and lost revenue.
Understanding the Stages of a Marketing Funnel
Before we dive into the nitty-gritty of creating an effective lead funnel, it's crucial to understand the stages of a marketing funnel. A marketing funnel consists of three main stages: awareness, consideration, and conversion.
Marketing Funnel Stage 1 – Awareness:
At this stage, your goal is to create brand awareness and attract the attention of your target audience. You can achieve this through various channels such as social media, content marketing, and advertising. The key is to provide valuable and relevant content that resonates with your audience.
Marketing Funnel Stage 2 – Consideration:
Once you have captured the attention of potential customers, you need to nurture them and build trust. This stage is all about educating your leads and showcasing the value your product or service offers.
Email marketing, webinars, and personalized content are effective strategies to engage with your leads during this stage.
Marketing Funnel Stage 3 – Conversion:
The final stage is where the magic happens. Now that your leads are aware of your brand, and have considered your offerings, it's time to convert them into paying customers. This is where you make your sales pitch and demonstrate why your product or service is the best solution for their needs.
Testimonials, limited-time offers, and compelling call-to-actions play a vital role in encouraging conversions.
How to Create an Effective Lead Funnel
Now that you have a solid understanding of the marketing funnel stages, let's dive into the process of creating an effective lead funnel.
Here are the fundamental steps:
1. Define Your Target Audience:
Start by clearly defining your target audience. Who are they? What are their pain points? Understanding your audience will help you tailor your messaging and offers to resonate with them.
2. Create Compelling Lead Magnets:
A lead magnet is an irresistible free offer that entices potential customers to provide their contact information. It could be an ebook, a free course, or a helpful template. Make sure your lead magnet provides significant value and addresses a specific problem your audience faces.
3. Design Landing Pages:
A landing page is where your potential customers land after clicking on your lead magnet. It should be visually appealing, have a clear call-to-action, and capture the necessary information to follow up with the lead.
4. Implement Email Marketing:
Email marketing is a powerful tool to nurture your leads and move them through the marketing funnel. Set up automated email sequences that deliver valuable content and build a relationship with your leads.
5. Optimize Your Conversion Process:
Continuously test and optimize your lead funnel to improve conversion rates. Analyze data, track key metrics, and make data-driven decisions to enhance your funnel's performance.
By following these steps, you'll be well on your way to creating an effective lead funnel that drives results for your business.
Top Lead Gen Tactics for Each Stage of the Funnel
Now that you know how to create a lead funnel, let's explore some top lead generation tactics for each stage of the funnel.
Awareness Stage Tactics: At this stage, focus on increasing brand visibility and attracting your target audience. Leverage social media advertising, collaborations like summits and bundles, and content marketing to reach a wider audience. Engage with your audience through comments, shares, and likes to build brand awareness.
Consideration Stage Tactics: In the consideration stage, your goal is to nurture leads and establish your credibility. Folks want to know that you’re knowledgeable and experienced when it comes to your niche before they trust you with their money. Offer valuable content such as webinars, case studies, and debriefs that showcase your expertise. You can use retargeting ads to stay top of mind with your leads and encourage them to take the next step if you’d like.
Conversion Stage Tactics: When it comes to the conversion stage, personalized and time-sensitive offers work wonders. Limited-time discounts, exclusive bonuses, and free trials can help push your leads toward making a purchase. Make the buying process as smooth and frictionless as possible to maximize conversions.
By tailoring your lead generation tactics to each stage of the funnel, you'll be able to attract, nurture, and convert leads effectively.
Tools and Software to Optimize Your Lead Funnels
Implementing lead funnels can be made a lot easier with the help of various tools and software. Here are some top recommendations:
1. Landing Page Builders: Tools like Thrivecart or Leadpages allow you to design stunning landing pages without the need for coding knowledge. These platforms offer loads of extra features and integrations with popular email marketing services.
2. Email Marketing Automation: Platforms such as Drip and ConvertKit offer robust email marketing automation features. They allow you to set up automated email sequences, segment your audience, and track the performance of your campaigns.
Not sure which email marketing platform to use for your business? Let Email Service Matchmaker help you make an informed decision!
3. Analytics and Tracking:Fathom Analytics or Google Analytics is a must-have tool for tracking the success of your lead funnels. They provide valuable insights into website traffic, conversion rates, and user behavior. However for privacy regions, especially in Europe, I don’t prefer Google Analytics/GA4. I am happy with Fathom Analytics. I also like that I can see all of my sites current traffic in one place, on one screen.
Additionally, tools like Hotjar offer heatmaps and user recordings to understand how visitors interact with your landing pages.
These are just a few examples of the many tools and software available to optimize your lead funnels. Explore different options and find the ones that best suit your business needs.
Common Mistakes to Avoid When Implementing Lead Funnels
While lead funnels can be highly effective, there are some common mistakes that businesses often make. Here are a few to avoid:
1. Lack of Personalization: Generic messaging and offers won't cut it in today's competitive landscape. Personalize your lead funnels to cater to the specific needs and pain points of your target audience. Start for sure by asking for their first name on the opt-in form when they’re signing up for their freebie, and use their name where appropriate in the follow up emails.
2. Overcomplicating the Funnel: Keep your lead funnel simple and easy to navigate. Don't overwhelm your potential customers with too many steps or information.
3. Inconsistent Follow-Up: Consistent follow-up is crucial for nurturing leads. Make sure you have a robust email marketing strategy in place to engage with your leads regularly.
If you struggle with writing emails consistently to your list, check out the amazing Email Marketing Membership!
By avoiding these mistakes, you'll ensure that your lead funnels are optimized for success.
How to Measure and Track the Success of Your Lead Funnels
Measuring and tracking the success of your lead funnels is essential to optimize your strategies and drive better results.
Here are some key metrics to monitor:
1. Conversion Rate: This metric tells you the percentage of leads that convert into paying customers. It helps you understand the effectiveness of your lead funnel in driving conversions.
2. Cost per Lead: Calculate the average cost per lead to evaluate the efficiency of your lead generation tactics. This metric allows you to allocate your marketing budget effectively.
3. Engagement Rate: Monitor the engagement rate of your emails, landing pages, and social media posts. A higher engagement rate indicates that your content is resonating with your audience.
4. Return on Investment (ROI): Calculate the ROI of your lead funnels by comparing the revenue generated with the investment made in acquiring leads. This metric helps you determine the profitability of your marketing efforts.
By regularly analyzing these metrics and making data-driven decisions, you can continuously improve the performance of your lead funnels.
Final Thoughts
Congratulations! You've now reached the end of this ultimate guide to lead funnels. Now that you are armed with the knowledge and strategies shared here, you're ready to take your business to new heights.
Remember, lead funnels are not a one-size-fits-all solution. Experiment, iterate, and tailor your lead funnels to your unique business needs. With the right tactics, tools, and a data-driven approach, lead funnels can become a powerful asset in your marketing arsenal.
If you're ready to take the next step, click the link below to learn exactly how to set up your first tripwire funnel and set up fully automated flash sales for every single new email subscriber with Freebie to Flash Sale.
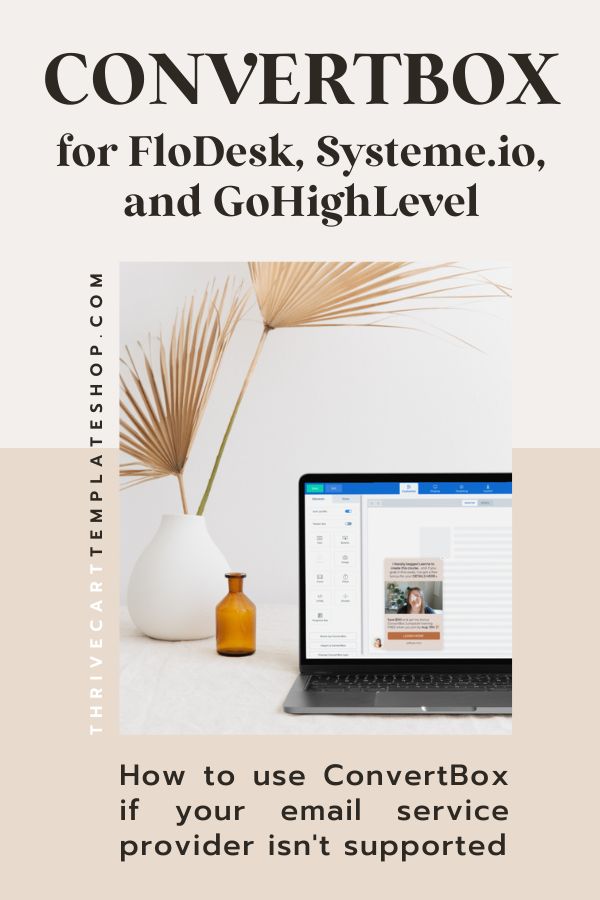
Is it still worth buying ConvertBox even if your email service provider isn’t a native integration? ConvertBox is a powerful tool that allows you to create engaging popups, forms, quizzes and surveys to capture leads and make more sales of your products.
Currently, ConvertBox supports integration with 14 popular email service providers like ActiveCampaign, ConvertKit, Drip, AWeber, Hubspot and more. See the full list here. But what if you use Flodesk, Birdsend, FG Funnels, GoHighLevel, System.io or some other email service provider that isn’t currently supported? Don't worry; you still have plenty of options to make the most of ConvertBox.
How to Use ConvertBox with FloDesk, BirdSend, Systeme.io, GoHighLevel, and other non-natively supported email service providers
Connecting ConvertBox via Automation Software
If your email service provider isn't directly supported by ConvertBox, you can bridge the gap by using automation software like Zapier, Pabbly, Integrately, Make, or SureTriggers. These platforms act as connectors, enabling you to transfer data seamlessly between your email service provider and ConvertBox. Heads up: ConvertBox will post a webhook, and for some automation softwares, like Zapier, webhooks require a paid plan.
If you want to use FloDesk with ConvertBox, you’ll need a paid Zapier plan.
Connecting ConvertBox via Webhooks
A webhook is sort of like throwing a ball with a message on it into the air – ConvertBox shares the data on your new lead, like their first name and email address, but your email service provider has to catch it in order to actually subscribe the person. Not all email service providers can catch webhooks, or trigger an automation with an inbound webhook, but if yours can, this is a good option and does NOT require Zapier or any other paid software.
If you want to use Systeme.io with ConvertBox, you can collect leads via ConvertBox’s webooks feature without Zapier. Read more on Systeme.io’s website here.
If you want to use GoHighLevel or FH Funnels with ConvertBox, you can easily add the base code to your website and pages, and to collect leads, you’ll need to set up an automation that has Inbound Webhooks as its trigger. Note: this is a Premium feature with GoHighLevel but is included with FG Funnels for free. Zapier is not needed. Here’s a support doc from GoHighLevel about Inbound Webooks.
Connecting via ConvertBox’s HTML form integration
This is another alternative you can use if your email service provider is not natively supported by ConvertBox. As long as your email service provider supports HTML form codes, you can use this to collect leads with ConvertBox without Zapier.
Of the three options, using webhooks and HTML form integrations are more technical, but if you want to avoid paying for Zapier or other automation software, it’s a good alternative.
How to Use ConvertBox to Make More Sales, Without Collecting Leads
Even without collecting leads directly into your email service provider, you can still make the most of ConvertBox's features:
Promote Products Directly: Drive sales by showcasing your products or services through targeted popups.
Share Sales and Promotions: Let your audience and casual web traffic know about special offers, discounts, and limited-time deals using ConvertBox. You can add a countdown timer too, to help them understand the urgency of the promo.
Recommend Affiliate Products: Monetize your platform by recommending affiliate products through ConvertBox. Use page-by-page targeting or WordPress blog categories. You can even have multiple affiliate ConvertBox campaigns that rotate automatically for you.
Share Popular Content: Have a blog post or some social content that is crushing it? Use a ConvertBox popups to share it with folks cruising your website.
Set Up Exit Intent Popups: Reduce cart abandonment with exit intent popups on your sales pages. You can add a coupon or recommend a related but lower-priced product if they’re about to navigate away from your sales page.
Collect Testimonials: Yes, you can use ConvertBox inside your course platform. Gather valuable feedback and testimonials from your customers through popup forms.
Communicate with Students: Engage with your course participants directly within your course platform using ConvertBox. I use these to let them know about upcoming live Q&As, workshops, or when I’m adding improvements to the courses they already have.
What are the Drawbacks of Using ConvertBox with Non-Supported Email Service Providers?
While using a non-supported email service provider with ConvertBox can still be very lucrative when you use the strategies listed above, there are some limitations to using ConvertBox with an email service provider that isn’t natively supported.
Here are some constraints to consider:
Inability to Target Based on Products Purchased or Tags – since ConvertBox isn’t automatically communicating with your email service provider, that means you don’t have as much data for targeting, such as showing a ConvertBox only to leads who have already purchase a specific product or have a tag in your email service provider.
Lack of Personalization with First Names in Popups or Messages – a nice feature of ConvertBox is to be able to add their name to one of your popups (with a fallback of “friend” or “there”) but when you don’t use one of the supported email service providers, this option isn’t open to you
Here’s a suggested workaround though: If you exclusively use ConvertBox forms to collect leads (via Zapier, webhook, etc), ConvertBox may not have access to your customer’s tags or past purchases, but as long as you ask for a first name on your forms, it should be able to store that data and allow name personalizations until the person clears their cookies.
Why ConvertBox Is Still Worth It
Despite some of the personalization and targeting limitations I mentioned above, ConvertBox is still a hugely valuable tool for making the most of your marketing efforts, improving student experience, and making more sales from casual website visitors. Its intuitive interface, customizable features, and ability to engage and convert visitors make it a worthwhile investment, even if your email service provider isn't natively integrated. With creative workarounds and strategic applications (I can help with this!), you can maximize ConvertBox's potential and drive results for your online business. If you don’t yet have ConvertBox, I clearly highly recommend it! In fact, it had a huge financial impact on my business to the tune of $5k in extra digital product sales in 2023 alone. Curious? Check out my free 13-minute mini training here:
Hey there, brilliant biz owners! Ready to change your lead magnet tripwire from a mere handshake to a full-on high-five that gets your audience excited and your sales revenue growing? Let’s dive into the nitty-gritty of making your lead magnet tripwire not just noticeable but irresistibly clickable (and buyable!).
Lead Magnet vs Tripwire
Before we go into ways to sell more of your tripwire offers, let’s chat about the difference between a lead magnet vs tripwire.
Both are powerful in their own right, but they play very different roles in your marketing strategy. A lead magnet is designed to grab attention by offering something valuable for free, usually in exchange for their email address.
After signing up for a lead magnet, a few things might happen:
1) A simple ‘check your email’ message appears.
2) They are redirected to a thank you page without an offer on it
3) They are redirected to a thank you page with a time-sensitive offer on it (this is the tripwire offer)
A tripwire is typically an irresistible, low-cost offer, making it hard for your audience to say no. It's the small commitment that leads to bigger things.
While the lead magnet woos and wins trust, the tripwire converts that budding relationship into a sales transaction. Together, they create a dynamic duo, turning casual onlookers into invested fans, one step at a time.
10 Ways to Improve Your Lead Magnet Tripwire Conversion Rate
1. Nail Your Lead Magnet
Your lead magnet is your opening act – it's got to be engaging, valuable, and so stinkin’ relevant that your audience can't help but want more.
Think of it as your first date – you want to impress, engage, and ensure there's a second date, right? Make sure your lead magnet solves a real problem in a way that's as easy as grabbing your favorite snack (because who doesn't love a good treat?). This isn’t a place for a long, rambling free course but something actionable they can implement or use ASAP.
2. Price Your Tripwire Like It's Happy Hour
Finding the sweet spot for your tripwire pricing is like hosting a happy hour – it should be enticing and feel like a great deal. Whether it's $5 or $50, the price should make your leads think, “Wow, I’d be losing money if I didn’t grab this deal!”
It's all about making it a heck-yes, wallet-friendly choice.
3. Bridge That Lead Magnet to Tripwire Gap Smoothly
Imagine your lead magnet and tripwire are parts of a thrilling movie series. The transition should be as smooth and compelling as moving from one exciting scene to the next.
Your audience should be at the edge of their seats, popcorn in hand, eager to see what's coming. Align your messaging so that moving from the lead magnet to the tripwire feels like the natural next step in an epic saga.
Make sure they understand that 1) their new lead magnet is on the way and 2) how your tripwire offer relates to it
4. Amp Up the Value Volume
I’ll be blunt – perception is the name of the game. Are you doing your best to truly convey the value of your tripwire offer? To make your tripwire irresistible, pack it with value that screams, “This is the deal of the century!”
Think bonuses, limited-time offers, and those sweet customer testimonials. It's about giving your audience the VIP backstage pass experience.
5. Craft a Sales Page That Sells Itself
Your tripwire sales page is your stage – and you're the rockstar. Every word should sing with benefits, compelling CTAs, and the kind of persuasive charm that would make even the most reserved audience member get up and dance.
Use authentic urgency (read: do not bother using countdown timers that just start over when they expire, ick!), scarcity, and your unique voice to turn casual browsers into raving fans.
6. Make the Checkout a Breeze
Ever been in a line so long you forgot why you were there? Don't let that be your checkout process. Simplify it, break it down into baby steps, and watch as your audience goes from “just looking” to “take my money!”
7. Don't Ghost – Follow Up!
Not everyone buys on the first pitch, or time that they hear about your product, and that's okay. Set up a follow-up sequence that's like a friendly nudge, not a pushy salesperson. Remind them of the awesome deal they didn’t get take you up on and maybe throw in a special discount to sweeten the pot.
8. Test, Tweak, and Triumph
The digital world is always changing, and so should your lead magnet tripwire strategy. Test different elements of your lead magnet and tripwire.
Keep what works, toss what doesn’t, and always be ready to adapt.
9. Build Trust Through Education
Sometimes, your leads need a little warming up. Use your emails to educate, inspire, and sprinkle in a little bit of your magic. Show them you're not just selling – you're solving.
10. Social Proof It Up
Nothing speaks louder than a chorus of happy customers or clients. Let your satisfied fans do the talking with reviews, testimonials, and success stories that turn skeptics into believers. You can even just use screenshots of happy customers, with their privacy protected of course, unless they give you permission to share.
Ready to put it all together and create your tripwire funnel?
If all this sounds exciting but you’re craving a step-by-step guide to make your lead magnet tripwire truly shine, why not check out my Freebie to Flash Sale training? It’s your backstage pass to converting leads like a rockstar. Learn more here!
Remember, folks, converting leads is like hosting the ultimate party – you want everyone to have a great time and keep coming back for more. With these tips and your unique flair, you're not just hosting a party; you're creating an experience that's unforgettable. Let’s turn that lead magnet tripwire into your most happening event yet! Ready, set, convert!
Choosing the right email marketing platform can feel like navigating a maze with lots of options and features to consider. Seriously, I’ve tried ‘em all! Two notable contenders in this arena are Drip and ActiveCampaign. Both offer robust solutions but cater to different needs and preferences. In this detailed comparison of Drip vs ActiveCampaign, I’ll dig into their features, usability, and pricing to help you make an informed decision.
And for those of you seeking more information and recommendations, stay tuned for details on my Email Service Matchmaker training at the end of this post.
Drip: The E-commerce CRM Powerhouse
Drip brands itself as an e-commerce CRM, offering solutions that go beyond traditional email marketing. Its features are specifically designed to drive sales by creating personalized customer journeys.
Key Features of Drip:
E-commerce Integration: Drip provides deep integrations with popular e-commerce platforms like Shopify, WooCommerce and Thrivecart, making it easier to track customer interactions and tailor campaigns based on shopping behavior.
Automation Workflows: With Drip, you can create complex, automated workflows that trigger based on customer actions, ensuring timely and relevant communication. Not all email automation softwares are the same: Drip’s workflows are detailed and incredibly granular which can help you really zero-in on your segments
Personalization and Segmentation: Drip allows for advanced segmentation, enabling you to send highly targeted and personalized content, thereby increasing engagement and conversion rates.
Visual Email Builder: Drip’s visual builder is intuitive, making it easy to design emails that align with your brand without needing extensive technical skills.
Integrations: You can connect Facebook ads account and add subscribers to custom audiences and gather leads from Facebook lead ads without Zapier. With included webhooks, you can easily connect to other software like Airtable and ManyChat, again, without wasting precious zaps.
Drip Email Pricing as of 2024:
Drip’s pricing is based on the number of contacts in your account, starting at $39 per month for up to 2,500 contacts, making it a scalable option for growing businesses. Drip also has very easy to understand pricing: there’s only one tier
ActiveCampaign: The All-in-One Marketing Automation Tool
ActiveCampaign positions itself as more than just an email service provider. It’s a comprehensive platform for customer experience automation, combining email marketing, automation, sales automation, and CRM.
Key Features of ActiveCampaign:
Advanced Marketing Automation: ActiveCampaign offers one of the most robust automation capabilities in the market, allowing for intricate, multi-step automations based on behavior, engagement, and more.
Built-in CRM: With its built-in CRM, ActiveCampaign lets you manage leads and sales processes, aligning marketing and sales efforts seamlessly.
Dynamic Content and Personalization: ActiveCampaign excels in personalization, allowing you to deliver content tailored to individual user preferences and behaviors.
Reporting and Analytics: ActiveCampaign provides comprehensive reporting features, giving you insights into campaign performance, sales, and customer behavior.
ActiveCampaign Pricing as of 2024:
ActiveCampaign’s pricing is more complicated; it’s based on the number of contacts in your account, starting at $49 per month for up to 1,000 contacts, and also the features you choose to add, such as the CRM/pipeline, SMS marketing, and more. ActiveCampaign is not a budget choice.
Drip vs ActiveCampaign: Making the Choice
While both platforms offer excellent features, the choice between Drip and ActiveCampaign often boils down to your specific business needs.
I currently use and love Drip, but it’s not the best choice for every business.
Email Service Matchmaker: Find Your Perfect Fit
Still wondering whether Drip or ActiveCampaign is the right tool for you? My Email Service Matchmaker training can help. This comprehensive guide goes into many more email service provider options, providing you with the insights to choose the email service that best fits your business needs.
Learn more about the Email Service Matchmaker training here and take the guesswork out of selecting your email marketing platform. I also cover MailerLite, FloDesk and ConvertKit compared to Drip and ActiveCampaign as well.
Whether you’re a solopreneur, a growing business, or an established company, finding the right email marketing solution is a pivotal step in your business journey. Let Email Service Matchmaker be your guide to a decision that aligns with your business goals and drives your marketing success.
Selling digital products online doesn’t have to equal hard-selling or flash sales every single day. With the right tools and strategies, you can learn how to market digital products in a way more simple way!
Even if you’re someone who loves launching and selling, including more evergreen or passive ways to make more sales is important for sustainability, preventing burnout, launch fatigue for you and your audience, and for giving you more time freedom in your business.
How Do You Sell Digital Products?
So, how exactly do you sell digital products in a way that feels easy, effective, and in true alignment with the kind of business you’ve always wanted?
Let’s dig into four simple ways to sell more of your digital products.
1) Evergreen Email Sequences
It’s so true: the money is in the list!
Having evergreen email sequences in place that do the selling for you on autopilot means that you don’t have to sell every day. They also continue to nurture your list, even if you aren’t able to write new emails every week.
Along with the power of evergreen email sequences, you might want to incorporate my Four by For Footer email strategy, too. You’ll be able to make even more money from every email (automated or not) that you send your list, while keeping them in touch with your latest offers or affiliate recommendations. Best part: it takes less than an hour to set up and 15 minutes a week to maintain!
2) Sell More With Upsells
Another super simple way to sell more digital products is to offer upsells. Presenting a new customer with another offer is a great way to increase your average revenue per order. Plus, it helps get your digital products in front of more people (and not just any people, but paying customers!)
I don’t think of upsells as just a way to sell more (even though they are!). I look at upsells as a way to surprise and delight new customers, which is exactly what I teach inside Unleashing Upsells.
3) Targeted Organic Traffic
Want to know one thing that a lot of digital product sellers don’t consider? SEO! It might seem complicated or that it takes too long, but it really isn’t as hard as it seems.
Organic traffic from search engines is the highest quality traffic because those people are already searching for a solution (which your digital product is!).
My friend Tara has an awesome Easy SEO Mini-course that covers everything you need to know (and avoids all of the extra stuff you don’t really need to understand).
4) Using ConvertBox Strategically
Most people think of ConvertBox as a tool to increase your email subscribers and promote your freebies, or simply just to collect leads with pop-ups. But there are so many other ways to use this tool to sell your digital products! Hands down, after Thrivecart, this is one of the most powerful and revenue-impacting pieces of tech I use in my business.
You can learn all the ways I use it inside ConvertBox Jumpstart and snag all of my conversion-friendly done for you templates.
Final Thoughts
Folks can’t buy digital products they don’t see or even know about and these 4 strategies help me to make digital product sales every single day.
Diving into the world of digital product marketing doesn’t have to be like solving a complex puzzle. With the straightforward strategies we've chatted about it's all about making your digital product marketing strategy feel like a natural extension of your brand.
Selling digital products online is less about the hard sell and more about sharing solutions, sparking genuine connections, and sprinkling value like confetti at every opportunity.
As you take these next steps, think of these insights and tools as your trusty sidekicks to selling more digital products with ease!
If you’re looking to improve your online course you are in the right place. Designing an online course is a big process. We spend a lot of time mapping out our content, recording lessons, and marketing the course. But, if you feel like your online course could be improved there are some super simple things you can do.
Why the Solution Isn’t Adding More Content
Most of the time when we ask ourselves, ‘How could the course be improved?’, we always immediately go to: add more content!Create more lessons!
But that is usually the wrong way to go.
Your students don’t want more content to wade through. They want shortcuts and things that will make implementing the course easier.
Who wants to watch hours and hours of content? Not me! Just give me the goods so I can take quick action.
Your students are looking for efficiency and effectiveness in their learning journey, not just more material to sift through. They crave shortcuts, practical tips, and strategies that facilitate easy implementation of what they learn.
Simple Ways to Improve Your Online Course
There are a lot of super simple ways to improve your online course. Today we will be digging into the top 4 ways to add more value to your course without creating a ton of new content or lessons.
1) Improve Your Onboarding Process
The first way to improve your online course isn’t even the course itself – it’s your onboarding process for new buyers and students. If you want to make it easier for students to have a great experience, they need to actually go through the course.
The way to get more people to go through the course? A solid onboarding process that gives new students all the info they need. This can be as simple as where to log in and where to find extra resources or support, like in your online community. Simple.
And if it’s a self-study course, don’t forget about the follow-up! Adding a few extra emails to your post-purchase email sequence is a simple way to create a better impression.
You can also use this opportunity to:
Remind your new students about the course and how to get started
No one is going to remember how/where to log into your course platform, so how easy are you making it for folks to find the link to login?
Here are my top suggestionsstrong recommendations for places to add a link to your course dashboard login:
At the bottom of every single email you send – just add it to your email footer, right before the unsubscribe button
On the header bar / main menu of your website
In the footer of every page on your website (its ok to exclude sales pages, but every other page should have it!)
2) Improve Your Course Accessibility
Instead of adding new content, maybe you need to add different ways for your students to consume your course content. We all learn differently and having options for all types of learners allows you to help more students get the results you promised.
Here are some simple ways to improve your online course accessibility:
Use Descript to chop up a long video into smaller chunks
Add closed captioning to all videos (I also use Otter for this!)
Have a private podcast feed for your online course so folks can listen to the content on the go
Allow students to download a PDF copy of slide deck presentations
3) Improve Your Course Design
When we talk about improving your online course we can’t forget about the design! There are so many ways to make your design more user-friendly.
Yes, you want to use design to keep things on-brand, but design is also important for the user experience.
Here are a few examples:
Talk about specific lessons, tools, or resources in a video? Add a resources section under the video with links so they are easily accessible to students.
Add timestamps to longer videos so they can skip to the specific part they need
Add important info, links, and outline what to expect in the welcome lesson or course dashboard
Create a community for your students (I personally love Heartbeat for off-Facebook private community options! Slack is a decent free alternative, but heads up: content disappears after 90 days when on the free plan)
4) Add Valuable Course Assets
Instead of adding even more modules and lessons, why not make the most of what you’ve already created? You can do this by adding valuable course assets that will help your students take action.
Example 1: A lesson about mapping out your content pillars could have a fillable workbook to help them work through the lesson and end up with an action-inspiring plan at the end.
Example 2: A lesson about mapping out your expenses could include an Airtable base template or a spreadsheet to help them do this.
Remember that the key is not in quantity but in quality. It's about refining and enriching the learning journey for your students, not overwhelming them with more content.
Think of your course as a finely crafted story where every element has its purpose and adds to the overall experience. By focusing on aspects like onboarding, accessibility, design, and valuable assets, you're not just adding to the course; you're deepening its impact and making it more meaningful for your students.
In the end, the most powerful improvements are often the simplest.
As you implement these changes, keep your ears open to feedback from your students. Their insights can guide you in continually refining your course.
Remember, a great online course is an evolving journey, both for you and your students. Here’s to creating educational experiences that are as rewarding as they are enlightening!
When you’re known as the ‘go-to Thrivecart person’ you get asked a lot of questions! In this blog post, I decided to round up the 7 most common questions I get about Thrivecart and keep them in one handy place for you.
Whether you are already using Thrivecart or are considering switching and migrating to Thrivecart, this post is for you.
7 Biggest Thrivecart Questions:
1) Should I switch to Thrivecart?
By far, the Thrivecart question I get the most is, ‘Should I switch to Thrivecart?’
This question actually inspired the creation of my Move to Thrivecart group program.
And the answer, to be completely honest, is: it depends, but probably yes.
While I loveeee Thrivecart and typically recommend it to everyone who is selling courses or digital products – there are a few questions you should ask yourself first:
What are you using right now that Thrivecart would replace?
What are you paying for all of those tools right now?
Are you able to invest in Thrivecart right now?
When will you have the time and capacity to make the switch / set everything up?
2) If I switch to Thrivecart, can I move current payment plans over?
No. If you’re using another platform right now and want to switch to Thrivecart, you aren’t able to move over current payment plans.
Your students or customers will need to either 1) finish their payment plans on the current platform OR 2) sign up for a new payment plan with you in Thrivecart. I think there are strategic ways you can and should incentivize that, but yes – sometimes it’s hard to get folks to pull out their card again.
3) What exactly can I streamline with Thrivecart?
It would be easier to say what you can’t do with Thrivecart, but here’s a full list of what you can streamline (or stop paying other tools for):
Sales funnels (including bump offers, upsells, and downsells)
Affiliate program that can run totally hands-off
Course and digital product hosting (with Thrivecart Learn)
Automation (Thrivecart integrates with most email marketing providers so no need for Zapier or other 3rd party software for most options)
Heads up: Thrivecart will send some automated transactional emails for you automatically, such as a purchase receipt, login set up emails, notifications of new courses added to your dashboard, etc but for all marketing emails, you’ll need an email service provider – more on that below.
4) What else do I need besides Thrivecart for my business?
It depends on your specific needs and what your business looks like. But, a few of the most common extra things you’ll need beyond Thrivecart are:
An email marketing provider – I currently use Drip, but if you aren’t sure which one is right for your business, you might want to check out Email Service Matchmaker. This $9 workshop + comparison guide will help you figure out which ESP is best for you, your budget, your needs, and your style.
Video hosting – Thrivecart doesn’t host videos so you will need somewhere else to host your videos that you can then embed into your Thrivecart Learn lessons. I personally use ScreenPal. Others embed Loom videos, host their videos with Vimeo, Bunny.net, or Searchie.
A community (optional) – if you have a membership or program with a community you can use a private Facebook Group, Slack on a free or paid plan, or my personal favorite that I use for Bundle Formula, Heartbeat.
5) What’s the big difference between Thrivecart and Thrivecart Pro?
Thrivecart Pro has some pretty valuable extra features included, like:
In my opinion, it’s worth the extra one-time upgrade cost to a Pro account. There are a lot of reasons why but the big one is: affiliate programs! If you’re selling courses and digital products, you’ll definitely want to get your own affiliate program up and running!
Along with Thrivecart Pro, there is also the upgraded option of Learn Plus, which includes extra course platform features, like:
Creating bundles of products so you can deliver multiple courses/templates with one purchase, if you’d like
Advanced tagging for course access (for example: if I only want people who purchased early bird to get access to a specific lesson in the course, I could only include people with that tag in Learn to see it)
Bulk importing students via CSV – extra useful if you are switching from another platform
6) Do I have to pay my affiliates through PayPal?
Yes and no.
The only option for paying affiliates directly from Thrivecart is via PayPal. However, you can mark affiliate payments as ‘manual payments’ and send your affiliates their payment another way (like through Wise or Stripe), but that will have to be done manually.
7) Can I use Thrivecart and Thrivecart Learn for my membership?
Yes! I have created an entire training on this for you because there are some extra things to think about when setting up a membership. Click here to check out Thriving Memberships!
Want to see behind the scenes of how I use Thrivecart?
You’ll want to watch this quick (seriously, 15-minute) video showing you exactly how I use Thrivecart for my entire funnel system – that’s sales pages, checkouts, affiliate program, and my course platform – without a single Zap.
If we haven't met before I'm Dama and I love all things tech. I am all about finding the best and simplest way to save time, and using the right course creation tools is how I do it. In this blog post, I’ll share the tech stack I use to manage my online courses and digital products.
My Favorite Online Course Creation Tools and Resources:
1) For Sales Pages, Checkout Pages, Affiliate Program, and Course Hosting – Thrivecart & Thrivecart Learn
I’ve tried many email marketing service providers over the years, including MailerLite, FloDesk, ConvertKit, and ActiveCampaign, but I’m currently using Drip because of:
1) It’s powerful integration with Thrivecart and…
2) The advanced analytics and data
Not sure which email marketing provider to use for your business? Drip isn’t necessarily the right choice for everyone, but you can get all of the techy details inside Email Service Matchmaker.
For Selling Courses on Evergreen
Who doesn’t love evergreen sales? Live launching is great and all, but those daily sales notifications are pretty great!
3) ConvertBox
One of my favorite tools for selling more evergreen courses is ConvertBox.
As you’re reading this post, you’ve likely seen a ConvertBox in action over to the side. Pretty cool, right?
It’s a perfect tool for targeting visitors with what they want. It helps grow your email list and convert more traffic into new customers.
4) Deadline Funnel
Besides ConvertBox, another great tool for selling more courses and digital products is Deadline Funnel. With this software, you can create ethical evergreen countdown timers for special one-time offers, tripwires, and flash sales. ConvertBox and Thrivecart also have built-in countdown timers, but not nearly as sophisticated and powerful as Deadline Funnel.
5) For Creating Course Workbooks and Worksheets – Google Docs
Starting with a blank doc can be a challenge, though, which is why I created my best-selling digital product – On-Brand Fillable Workbooks. With this training, you’ll be able to create your own fillable workbooks for your course.
For Course Automations
We can’t talk about tech tools without digging into automations!
6) Zapier
You can easily create zaps to connect different tools. My most common way to use Zapier is to connect Thrivecart events (purchases, failed payments, etc.) to my Airtable bases.
7) Airtable
There is nothing that makes my heart happier than playing around in Airtable to figure out a way to simplify or automate something. A lot of my business automations and processes are handled through Airtable.
Sidenote: If you want to dig into Airtable more, you might want to check out my friend Ashley’s program Systems Over Stress.
8) For Video Hosting – ScreenPal
There are a lot of options out there for video hosting and they can become pretty expensive. For hosting my course videos, I use Screenpal. It’s almost like a Loom & Vimeo alternative in one.
With ScreenPal, I can share direct video links and embed videos directly into my course in Thrivecart Learn.
9) For Transcriptions – Otter, CastMagic, or Transcript LOL
For accessibility and course accessibility, I lovee Otter for transcriptions. It also allows you to connect with Zoom so attendees can turn on live subtitles during live training sessions.
CastMagic is also a really great tool that brings in AI features to help you make the most of your newly transcribed recording. It's also got a really great ‘share this transcript' feature that will embed the audio (or video!) you uploaded, along with the transcript, with speed control. I use that a LOT.
Transcript LOL is something I grabbed on Appsumo as a lifetime deal – its not as feature rich as the other two, but if you ever see it pop up back again on Appsumo, grab it. So far, it's done the best job of generating timestamps for me of all them!
For Writing Sales Copy
Creating and selling online courses requires quite a bit of copy. While I love writing copy, I’m all about using course creation tools to save time.
10) Marketing Magic App
For sales pages and other bits of copy, the Marketing Magic App is the only AI tool out there designed for course creators and digital product sellers. It’s a magical resource and I can’t recommend it enough!
11) Damn Copy Templates
Another option I love and recommend are the course creator templates from my friend Sandra over at Damn Copy. These copy templates are super easy to work from and make your own.
12) For Private Audio Feeds
Having a private audio feed for your course is an awesome value-add for your students. Plus, it’s also a good thing to have for accessibility. The most popular option out there is Hello Audio, which is what I use.
13) For Course Legal Terms and Conditions
You can’t forget the legal aspects of creating and selling online courses!
If this is something you haven’t prioritized or need help with, you definitely need Braden Drake's Contract Vault. It’s jam packed with all of the legal templates you need as a course creator, plus it’s only really, really affordable.
For Graphics and Design
14) MOYO Mockups
A great course needs great mockups and that’s where MOYO Studio comes in to save the day! I love using all of their design resources and device mockups.
15) Canva Pro
I can’t forget to mention Canva Pro. In my opinion, the pro version is very much worth the monthly cost. You get access to so many more elements, resources, and fonts, for your designs.
Final Thoughts
As we wrap up this comprehensive guide on the course creation tools that have transformed my business, I want to emphasize the importance of choosing tools that resonate with your specific needs and workflow.
Remember, what works wonders for one person might not be the perfect fit for another. It’s all about finding that sweet spot where efficiency, ease of use, and effectiveness meet. My journey through various tech stacks has taught me that the right combination of tools can not only save time but also enhance the quality of your digital products and the experience you offer to your learners.
Don’t be afraid to experiment with new tools or switch things up if something isn’t working for you. Whether you’re just starting or looking to refine your current process, I hope this list serves as a valuable resource. Here’s to creating impactful, engaging, and successful online courses with the power of the right tools at your fingertips!
Are you ready to make your course content and digital products actionable and implementable? Today, we're going to dive into the world of creating worksheets for your course students.
How great would this be: your students are engaged and actively participating in their learning journey. With fillable worksheets and workbooks, you can provide them with valuable exercises that reinforce key concepts and help them apply what they've learned.
But where do you start? Don't worry, I've got you covered. In this guide, I'll show you how to create effective worksheets that will enhance your course content and make a lasting impact on your students' learning experience.
What Are The Benefits of Including Worksheets?
A worksheet or workbook that accompanies your course material has a lot of different benefits, including:
Making it easier for your online course students to implement their knowledge and work through each video lesson
It's an easy way to add more accessibility to your course because not everyone learns the best from videos only or even just audio
You'll get higher course completion rates and better course feedback from students
Added value to your course
Making worksheets and workbooks that accompany your lessons has a lot of benefits. Plus, it's actually a pretty simple thing to do!
Should I Use Canva for Course Worksheets?
Ugh, no.
While Canva is a great graphic design tool (I use it all the time, too!) I don't think it's the best option for course worksheets and workbooks.
Here's why:
Canva is focused on design, not usability, when it comes to workbooks. Plus, they are a nightmare to update. If you create a worksheet or workbook in Canva and something needs to be changed, you would need to:
Completely re-do pages, adjust fonts if you're adding more text than the page had previously, and completely configure things
Save it as a new PDF
Create a new fillable version using a 3rd party tool
Upload the printable and fillable versions
Change links to the new version wherever you have it listed
That's why using Google Docs is a much more user-friendly option when you create worksheets as a part of your course material.
4 Reasons Why You Should Use Google Docs For Your Course Worksheets
1) It's free and accessible for students.
Almost everyone uses Google Drive, and with Google Docs, they can easily make a copy of the worksheet to their own Google Drive account to fill it out. Easy peasy!
And if they don't use Google Docs a lot, they can always save/export it as a PDF or Word document if they prefer, or even just print it.
2) It makes it easy to update when something changes.
Another big reason why I love using Google Docs over something like Canva is because you can update the main Google Doc easily — anytime you want to. You don't have to worry about re-uploading or changing links.
3) They are easy for students to use.
The fact that Google Docs are editable once the student makes a copy is wonderful. They can easily remove colors to make their own printable version if they choose to. They can save it to a specific Google Drive folder. And if built properly, it will be super easy for them to go through the material and fill it out.
4) They can be made beautiful and branded.
One thing I hear about using Google Docs for your course material is, ‘But aren't Google Docs ugly and all look the same?!' and the short answer is: NO!
Google Docs can be beautifully branded for your business or online course.
Want to Learn How to Create Worksheets and Workbooks in Google Docs?
If you're now itching to recreate your PDF worksheets and workbooks into handy Google Docs, I created an actionable training just for you! On-Brand Fillable Workbooks is for course creators who want to improve their course material by including beautifully branded fillable workbooks. I show you exactly how to do this and you get access to all of my shortcuts and hacks.
Almost 4,000 people have snagged this epic training, and did I mention it's only $9?
Here are just a few testimonials from people who have used On-Brand Fillable Workbooks to transform their course material:
“I’ve been using Docs for years and still learned at least 10 new tricks! I’m off now to transfer all of my Canva workbooks to Google Docs…”
“Took me less than an hour to take a boring Google Doc and turn it into something super engaging & action oriented for my students.”
“Snagged this in the morning, made a workbook for my training at 1:00 today.”
What About Google Sheets for Course Content?
As quickly as I created On-Brand Fillable Workbooks, I had people asking me for the Google Sheets version, and it’s now live – Spot-On Spreadsheets. You’ll learn how to create functional and helpful Google Sheets for your audience and course students.
These are great as extra course materials or even as standalone digital products to sell!
Final Thoughts
The switch from Canva to Google Docs for your course worksheets isn't just a technical choice; it's a strategic move toward enhancing your students' learning experience.
By using Google Docs, you're choosing a platform that is not only user-friendly but also versatile and easily adaptable to any changes. This flexibility ensures that your course material remains relevant and up-to-date, providing your students with the most current and effective learning tools.
Remember, the goal is to make learning engaging, accessible, and practical for your students. Google Docs offers the perfect blend of functionality and aesthetics, allowing you to create worksheets that are not only informative but also visually appealing and aligned with your brand.