As a course creator, providing an enriching and seamless user experience is crucial for the success of your online courses. ThriveCart has become the go-to affordable user-friendly platform for course creators. Its dedicated course platform, ThriveCart Learn, has grown in popularity for its simplicity and effectiveness.
In this post, we’ll consider why ThriveCart Learn is a choice worth considering for your courses and how you can enhance your ThriveCart courses for a better student experience.
Why Use Thrivecart Learn For Your Courses
ThriveCart Learn offers an intuitive platform for course creators to share their knowledge with the world. The ease of setup, alongside robust features, makes it an attractive option for those looking to deliver quality content without a steep learning curve.
Plus the seamless integration with the ThriveCart checkout system makes for a smooth transaction process, enriching the overall user experience. 2 additional perks are the enrollment happens instantaneously (along with the ‘how to log in’ email they send) AND you don’t need Zapier for it. Triple win!
Now, let’s explore some strategies to elevate your ThriveCart courses.
How to Improve Your Thrivecart Courses
1) Improve Your New Student Experience
The journey of your students begins the moment they enroll in your course. Providing a warm and informative welcome can set the tone for what’s to come.
Whether you use Thrivecart’s own thank you page (aka success page) or have the checkout redirect to your own hosted on your website: make it clear what your new student can expect and give them what they need to know.
Consider creating a welcome video or a guided tour to introduce them to the course layout.
Additionally, make sure that the course navigation is intuitive, easy to use, flows nicely, and resources are easily accessible. The Thrivecart Learn layout you’ll want to use depends on the course product and how it’s laid out for students.
An informative FAQ section can also be a great asset to address common new student queries proactively.
2) Use a Custom Subdomain
Branding is pivotal in creating a trustful and professional image.
Utilizing a custom subdomain for your ThriveCart courses not only enhances your brand recognition but also instills a sense of credibility among your students. It’s super easy to set up in Thrivecart and provides a personalized touch, showing a level of professionalism and authenticity. You can also set up a course on a whole new domain. Nice perk: you can have multiple different custom domains, one for each of your courses, if you want.
3) Brand Your Course Login
The login page is often the first point of interaction your students have with your course platform.
Customizing the login page to reflect your brand aesthetics, using your logo, brand colors, and a friendly, personalized message can create a welcoming ambiance.
It’s these little touches that enhance the user experience and make your platform feel professional and engaging.
4) Brand and Customize Your Course Dashboard
Your course dashboard is the central hub where your students will access the course material – this is the landing page they’ll first see when they log in with ALL your courses on it. Branding and customizing the dashboard in alignment with your brand ethos provides a consistent and pleasant visual experience.
Some suggestions for elements to add to your course dashboard page:
How to get support, if needed
A link to your Facebook group or community
Affiliate program invitation or details*
A link to your blog or shop page
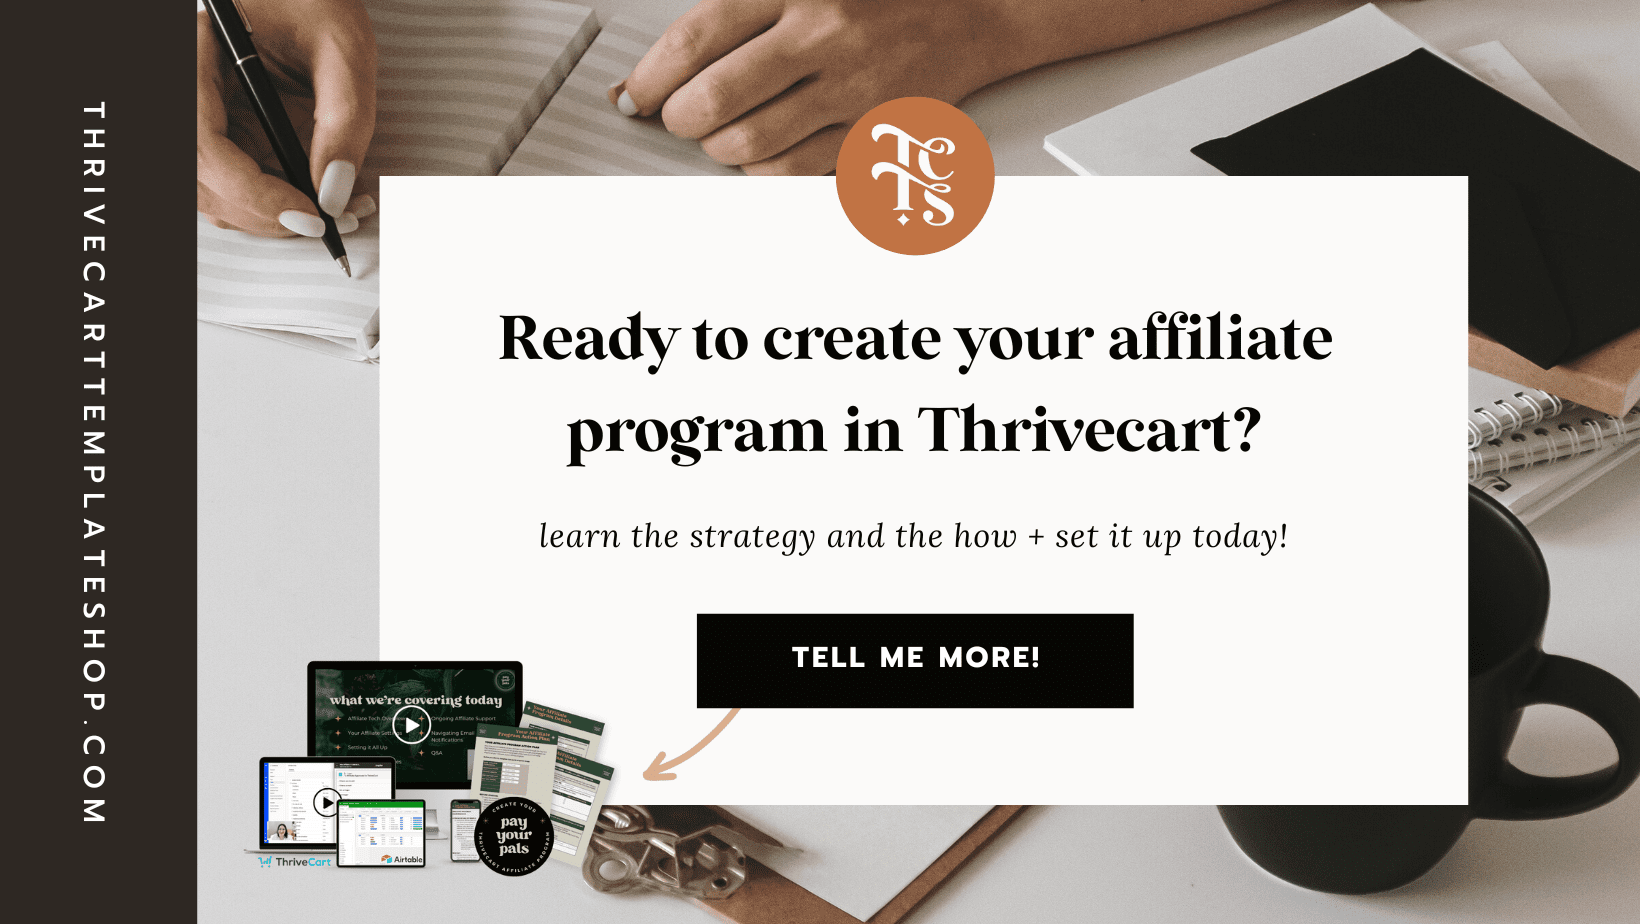
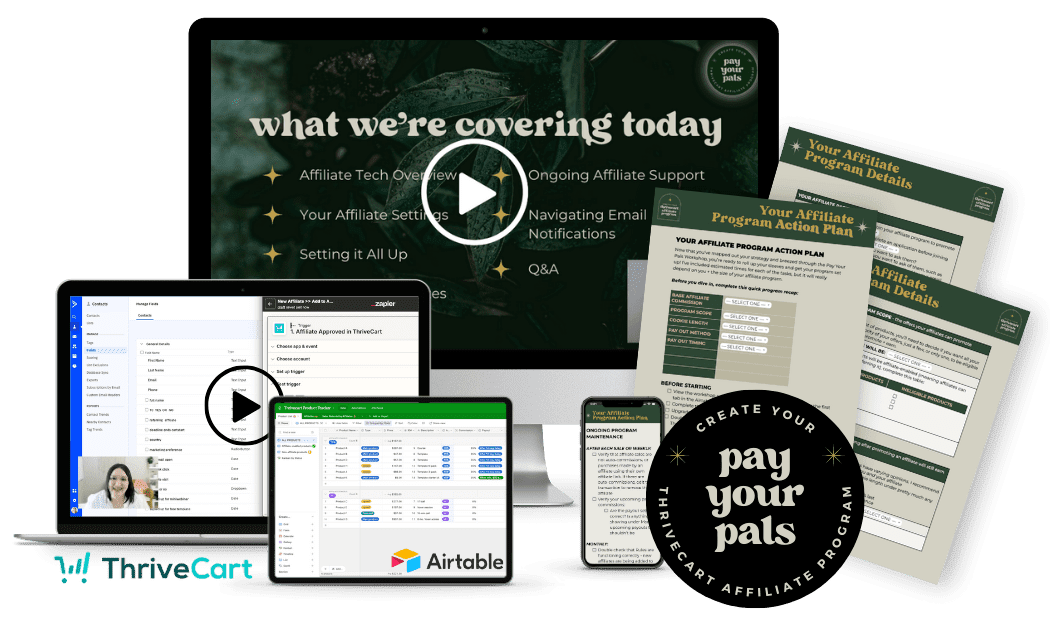
Don’t have an affiliate program? Learn how to set one up in an afternoon with Pay Your Pals!
Furthermore, organizing the course material in a structured and aesthetically pleasing manner can significantly enhance the ease of use and overall learning experience.
Not Using Thrivecart Yet?
I’m not bragging (ok, kinda) but I have one of the best Thrivecart affiliate bonuses around if you sign up for Thrivecart using my link. You’ll also want to check out CartStart, the course designed to help you know everything there is to know about using Thrivecart.
Final Thoughts
Investing time in improving the aesthetics and user experience of your ThriveCart courses can go a long way in creating a conducive learning environment. These enhancements, although seemingly small, can significantly impact the satisfaction and engagement levels of your students.
As you continue to refine your course delivery on the ThriveCart course platform, you’re not only providing value but also building a strong, recognizable brand with your digital products and online courses.
Black Friday and Cyber Monday are around the corner, and it's time to supercharge your sales strategy to make it your best Black Friday yet. In this guide, we'll explore simple yet effective ways to maximize your Black Friday and Cyber Monday sales using Thrivecart, along with some essential tools and tips.
Whether you're a B2B business or a B2C business, these strategies will help you make the most of this holiday shopping frenzy.
Simple Ways to Increase Your Sales For Black Friday & Cyber Monday
1) Add more bump offers and upsells
When it comes to maximizing your revenue during Black Friday and Cyber Monday, bump offers and upsells are your secret weapons and my personal favorite way to not only serve my customers by anticipating their next step and offering them a juicy discount, but also on a personal level for making more from every sale. Read on for stats and real numbers.
Bump offers are those enticing add-ons that appear right on the checkout page when a customer is making a purchase. They're like the virtual candy bars at the grocery store checkout – hard to resist and often a last-minute addition to the cart.
Now, let's talk about upsells. These are one of my absolute favorite ways to reward new customers and invite them to become repeat customers with a big discount, right on the upsell page. After your customer has made their initial purchase, you have a golden opportunity to present them with complementary products or upgrades that enhance their overall shopping experience.
Stats from a launch in October 2023:
Revenue generated from the main product: $5,946
Revenue generated from order bump purchases: $297
Revenue generated from upsell purchases: $4,956
For that launch alone, 44% of the revenue was from the incredible deal on the upsell. I’m so glad I offered it!
Here's the beauty of it: you're not only increasing your average order value but also providing additional value to your customers. They leave your business feeling like they've scored a great deal, and you've boosted your sales – a win-win situation.
To supercharge your Black Friday and Cyber Monday sales with bump offers and upsells, it's crucial to plan your offerings strategically. Make sure they align with the products or services your customers are already interested in. Plus, make these offers irresistible – create a sense of urgency or bundle complementary items for a special price.
To get more inspiration on crafting the perfect bump offers and upsells, check out my free resource, the Upsell Offer Locker. It's a treasure trove of 40+ offer ideas that will have your customers saying, “Yes, please!”
And for a deep dive into the tech, setup, and strategy behind effective upselling, consider enrolling in my course, Unleashing Upsells. It's your ticket to mastering the art of boosting your Black Friday and Cyber Monday sales.
2) Create a Black Friday landing page for affiliate offers
Affiliate marketing can be a powerful ally during the holiday season. If you're promoting products or services from other companies, consider creating a dedicated Black Friday landing page.
This page should feature all the deals and discounts you're offering through your affiliate partnerships.
It's a win-win situation: your audience gets great deals, and you earn commissions.
Learn how to create a Black Friday Deals page that updates itself so don’t ever have to worry about coming back to update it when a deal expires with my upcoming training, BFD.
3) Plan ahead early
When it comes to Black Friday and Cyber Monday, the early bird indeed catches the worm, or in our case, the sales. These two shopping extravaganzas are a big deal, and the key to success lies in meticulous planning.
Start your preparations well in advance. It's not just about having a good idea; it's about having a great strategy in place. Begin by brainstorming your offers.
What discounts, deals, or bundles can you offer that will truly captivate your audience? Consider what worked well in previous years and how you can improve upon it. The more thought you put into your offers, the more compelling they'll be when you present them to your customers.
Next, pay attention to aesthetics. Your visuals should be as attractive and exciting as your offers. Remember, first impressions matter, and a well-designed promotional image can be the difference between a click and a pass.
Now, let's talk about email campaigns – the backbone of your promotional strategy. Craft compelling email sequences that build anticipation and excitement in the weeks leading up to the big days. Send teaser emails to let your subscribers know that something incredible is on the horizon. As the days draw nearer, create a sense of urgency. Let them know that these deals won't last forever, creating that fear of missing out (FOMO) effect.
But here's the thing: the early bird doesn't just plan; they also adapt. Keep a close eye on market trends and consumer behavior. If you notice shifts in demand or preferences, be ready to adjust your strategy accordingly. Flexibility can be your greatest asset during this dynamic shopping season.
4) Send more emails
Email marketing remains a powerful tool for reaching your audience during the holiday season. However, you're not the only one vying for your customers' attention. To stand out in the crowded inbox landscape, you'll need to send more emails (get ideas here!), but not just any emails – strategic ones.
Segment your email list to target different customer groups with personalized messages. Send teaser emails before Black Friday and Cyber Monday, reminding your subscribers about the upcoming deals. On the big day, send out enticing emails with clear calls to action.
After the sale, follow up with thank-you emails and upsell opportunities.
5) Use tools
Efficiency is key during the busy Black Friday and Cyber Monday period. Utilize sales and marketing tools to streamline your processes.
Here are some of my favorites:
ConvertBox: A versatile tool for creating engaging pop-ups, forms, and quizzes to capture leads and promote offers.
Deadline Funnel: Create genuine urgency with countdown timers that encourage customers to take action. Another alternative to check out is Countdown Hero.
Marketing Magic App: Simplify the process of updating copy and content to align with your Black Friday and Cyber Monday promotions.
6) Get your affiliates involved
Lots of people are sharing deals and creating deal round-ups so make sure to let your affiliates know about your special offers.
Affiliate marketing can be a game-changer during this season of discounts. Encourage your affiliates to promote your Black Friday and Cyber Monday deals by providing them with all the necessary resources. If you haven't set up an affiliate program yet, don't worry. The Pay Your Pals training can guide you through the entire process using Thrivecart.
Final Thoughts
Black Friday and Cyber Monday are golden opportunities to boost your sales and revenue. Implementing these strategies and using Thrivecart's features wisely can help you make the most out of this shopping frenzy.
Remember to plan ahead, communicate effectively with your audience, and leverage the power of affiliates and marketing tools.
With the right approach, you can turn these hectic shopping days into a profitable success story for your business. Start preparing now, and get ready to thrive this Black Friday and Cyber Monday!
Are you having a hard time converting your website visitors into paying customers? If so, then you're in the right place. Sales funnels are critical to any successful online business, but they can also be confusing and overwhelming, especially if you're just starting out. That's why I’ve put together this blog post to answer ten of your biggest sales funnel questions.
So, grab a cup of coffee (or your beverage of choice – it’s kombucha for me!), and let's dive in!
Your Sales Funnel Questions Answered
1. What are the different stages of a sales funnel?
A sales funnel visually represents the customer journey from initial contact to the final sale. Put very plainly, a sales funnel is a set of web pages designed to move leads, or potential customers, towards a purchase.
While there are many variations of the sales funnel, most include four main stages:
Awareness: This is the first stage, where potential customers become aware of your product or service. They might find you through a blog post, social media, or advertising.
Interest: In this stage, prospects want to learn more about your product or service. They might sign up for your email list or download a lead magnet.
Decision: In the decision stage, prospects are evaluating whether or not to make a purchase. They might read reviews, compare prices, or request a demo.
Action: Finally, in the action stage, the prospect becomes a customer and makes a purchase. This might involve filling out a form, making a payment, or scheduling a call.
Remember that not all potential customers will move through each stage of the funnel. Some may drop off before they reach the final stage, while others may skip some stages altogether.
2. What are the benefits of using a sales funnel?
Using a sales funnel has a ton of benefits for your online business. Here are just a few:
It gives you clarity: A sales funnel means you have a clear plan for guiding your potential customers toward purchasing. This helps you focus your marketing efforts and get better results.
It's more efficient: With a sales funnel, you can create marketing campaigns that are designed to move prospects from one stage to the next. This saves you time and resources, making your sales process more efficient.
You'll get more sales: Optimizing – fine-tuning, improving – each stage of your sales funnel can convert more prospects into paying customers. This means more sales and revenue for your business.
You can build stronger relationships with your customers: A sales funnel includes strategies for customer retention and follow-up. By focusing on building long-term relationships with your customers, you can increase customer loyalty and lifetime value.
Overall, using a sales funnel is a smart move if you want to streamline your sales process, increase your conversions, and build a loyal customer base.
3. What are the key components of a successful sales funnel?
A successful sales funnel typically includes several key components. Here are some of the most important ones:
A clear goal:
Defining your goal is the first step in creating a successful sales funnel. What do you want to achieve with your funnel? Is it to generate leads, make sales, or something else? Having a clear goal will help you design a funnel that is tailored to your specific needs.
Targeted traffic:
Your sales funnel needs to attract the right kind of traffic to be effective. This means identifying your target audience and creating marketing campaigns that are designed to appeal to them.
A lead magnet:
A lead magnet is a valuable resource you offer your prospects in exchange for their contact information. This could be a free guide, checklist, or webinar. A strong lead magnet will help you capture and move more leads through your funnel.
Landing pages:
A landing page is a dedicated page designed to convert visitors into leads or customers. A good landing page will be focused on a single offer and have a clear call to action.
Email marketing:
Email marketing is a critical component of any sales funnel. By nurturing your leads with targeted emails, you can build trust, establish authority, and move them closer to making a purchase.
Sales pages:
A sales page is a dedicated page that is designed to sell a specific product or service. A strong sales page will highlight the benefits of your offer, address common objections, and make it easy for visitors to make a purchase.
Follow-up:
Following up with your customers after a sale is essential for building long-term relationships and encouraging repeat business. This could include sending thank-you emails, offering additional products or services, staying in touch inside a community on social media or in a forum, or providing ongoing support and resources.
By including these key components in your sales funnel, you can create a cohesive and effective marketing strategy that moves prospects smoothly from initial contact to sale.
4. How do you measure the success of a sales funnel?
Measuring the success of a sales funnel is crucial to optimizing your marketing efforts and improving your conversion rates.
Here are some key metrics you can use to track the performance of your sales funnel:
Traffic:
One of the first things you should measure is how much traffic you are driving to your sales funnel. This will give you a sense of how effective your marketing campaigns are at generating interest in your offer.
Conversion rate:
Your conversion rate measures the percentage of visitors who take a desired action on your site, such as opting into your email list or purchasing. This is a crucial metric for determining how well your sales funnel works.
Sales volume:
Ultimately, the success of your sales funnel will be measured by the number of sales you can generate. Tracking your sales volume will give you a clear sense of whether your funnel meets your revenue goals.
Average order value:
Another important metric to track is your average order value. This measures the average amount of money customers spend with you per order. Increasing your average order value can boost your revenue and improve your profitability.
Customer lifetime value:
The customer lifetime value (CLV) measures the total value a customer brings to your business throughout their relationship with you. By increasing your CLV, you can maximize the return on your marketing investment and grow your business over the long term.
By tracking these key metrics and making adjustments to your sales funnel based on the insights you gain, you can improve your conversion rates, increase your sales volume, and build a strong and profitable online business.
5. What are some common mistakes to avoid when creating a sales funnel?
Creating a successful sales funnel takes time and effort, and there are many potential pitfalls along the way.
Here are some common mistakes to avoid when creating a sales funnel:
Lack of focus:
One of the biggest things people need to correct when creating a sales funnel is trying to do too much. Instead of trying to appeal to everyone, focus on a specific target audience and create a funnel that is tailored to their needs.
No clear call to action:
Every stage of your sales funnel should have a clear call-to-action that tells your prospects what you want them to do next. Make sure your calls to action are clear, prominent, and easy to follow, such as “buy now,” “join today,” or “learn more.”
Ineffective lead magnets:
Your lead magnet is a critical component of your sales funnel, as it's often the first interaction a prospect will have with your brand. Make sure your lead magnet is valuable, relevant, and aligned with your target audience's interests and needs.
Poorly designed landing pages:
Your landing pages are where your visitors will decide to take action or leave your site. Ensure your landing pages are well-designed, easy to navigate, and focused on a single offer. Be sure to check that your pages also look great on mobile!
Neglecting existing customers:
Your sales funnel should continue after a sale. Be sure to provide ongoing support and value to your existing customers, which can lead to repeat business and referrals. This could be a simple and hands-off as creating a post purchase email sequence that lets your new customers know what to expect next and checks in on their progress along the way, while also recommending other offers or products you have for sale that might be helpful to them.
By avoiding these common mistakes and focusing on creating a sales funnel that is targeted, focused, and aligned with your customer's needs, you can improve your conversion rates and grow your business over the long term.
6. What are the best tools for building a sales funnel?
So many options exist to help you build an optimized sales funnel. Here is a list of my favorite and recommended tools:
Thrivecart – hands down my favorite funnels tool ever!
7. What are some effective ways to drive traffic to a sales funnel?
One of the biggest questions I always get is how to drive traffic to a sales funnel. You can’t measure your metrics without having a decent amount of quality traffic and data. Here are a few of the best ways to get more people into your sales funnel:
Content marketing:
Creating valuable content that is relevant to your target audience can help you attract visitors to your website and build your authority in your industry.
Be sure to promote your content on social media, in email campaigns, and through other marketing channels to drive traffic to your sales funnel.
Paid advertising:
Using paid advertising platforms like Google Ads or Facebook Ads can effectively reach your target audience and drive traffic to your sales funnel. Be sure to use targeting options to ensure your ads are reaching the right people.
Search engine optimization (SEO):
Optimizing your website for search engines can help you rank higher in search results and drive more organic traffic to your sales funnel. Be sure to focus on relevant keywords for your target audience and create valuable content that answers their questions.
Want to learn more about SEO and how to optimize your website – without the tech jargon? Check out my friend Tara Reid’s Easy SEO Mini Course.
Social media marketing:
Promoting your sales funnel on social media platforms like Facebook, Instagram, and LinkedIn can help you reach a wider audience and generate leads. Be sure to create engaging content tailored to the platform and encourage your followers to visit your sales funnel.
Referral marketing:
Encouraging your existing customers to refer their friends and family to your sales funnel can effectively drive traffic and generate leads. Be sure to incentivize referrals and give your customers the tools they need to spread the word about your brand. You can do this with an affiliate program or a referral program.
Want to learn more about creating an affiliate program? I’ve created my own Pay Your Pals training to help you create an affiliate program with ThriveCart.
Partnerships and collaborations:
Partnering with other businesses or influencers in your industry can help you reach a wider audience and drive more traffic to your sales funnel. Be sure to focus on partnerships that are aligned with your brand values and target audience.
A few great options for collaborations are podcast guesting, speaking at virtual summits, participating in bundles – or hosting your own!
By combining these tactics and testing different strategies over time, you can find the mix that works best for your business and drive more traffic to your sales funnel.
8. How do you nurture leads in a sales funnel?
A sales funnel only converts as well as the nurturing process! Nurturing leads in a sales funnel is critical for building trust and moving prospects closer to a sale.
Here are some effective ways to nurture leads in your sales funnel:
Personalization: Personalizing your messaging and content can help you connect with your leads on a deeper level and show them that you understand their unique needs and challenges.
Education: Providing valuable educational content like blog posts, e-books, and webinars can help you position yourself as an expert in your industry and provide value to your leads.
Email marketing: Email marketing is a powerful tool for nurturing leads, as it allows you to stay in touch with your leads over time and provide them with valuable content and offers. Need some help with email marketing? Check out the fantastic $9 per month Email Marketing Membership!
Segmentation: Segmenting your leads based on their interests, behavior, and demographics can help you provide more targeted messaging and content that resonates with their needs. One of the best tools to help you with segmentation is Drip.
Social proof: Using social proof like customer testimonials, case studies, and reviews can help you build trust and credibility with your leads.
Consistency: Consistently providing value to your leads and staying in touch with them over time can help you build trust and keep your brand top-of-mind when they're ready to purchase.
Follow-up: Following up with your leads and providing them personalized attention can help you move them closer to a sale and address any concerns or questions they may have.
9. How do you upsell and cross-sell in a sales funnel?
Upselling and cross-selling are effective strategies for increasing the average order value and revenue generated from your sales funnel. Here are some ways to do it:
Upsells:
Upselling involves offering customers a more expensive or premium version of the product or service they're already considering. To upsell effectively, you can:
Offer a higher-end version of the product or service with more features or benefits
Provide a bundled package that includes additional products or services
Recommend a complementary product or service that enhances the value of their purchase
Cross-sells:
Cross-selling involves offering customers a related product or service that complements the one they're already considering. To cross-sell effectively, you can:
Recommend related products or services that are frequently purchased together
Offer add-ons or accessories that enhance the functionality or convenience of their purchase
Suggest complementary products or services that solve other problems or needs they have
Bump offers:
Bump offers are a type of offer that is presented at the point of purchase. They typically offer a product or service that complements the one the customer is already buying at a discounted rate. To use bump offers effectively, you can:
Offer a product or service that enhances the value or benefit of the one the customer is already purchasing
Present the offer in a clear and compelling way at the point of purchase
Provide a limited-time or exclusive discount to incentivize the customer to take advantage of the offer
By incorporating upsells, cross-sells, and bump offers into your sales funnel, you can increase the value of each sale and generate more revenue for your business. Be sure to focus on offering products and services that are relevant and valuable to your customers and present your offers in a clear and compelling way to maximize their impact.
10. What are the best practices for creating sales funnel copy and messaging?
Creating effective sales funnel copy and messaging is essential for converting prospects into customers.
Here are some best practices for creating sales funnel copy and messaging:
1. Define your target audience:
Before you start writing copy, you need to understand your target audience and what motivates them. Use this information to create messaging that speaks directly to their needs and interests.
2. Focus on benefits:
Instead of focusing on features, focus on your product or service's benefits. Explain how your offering will solve your customer's problems, save them time, or improve their lives.
3. Use clear and concise language:
Keep your messaging simple and straightforward. Avoid using jargon or technical language that your customers may not understand.
4. Use storytelling:
Use storytelling to connect with your customers on an emotional level. Explain how your product or service has helped others overcome challenges and achieve their goals.
5. Create a sense of urgency:
Use urgency to encourage customers to take action. This can include limited-time offers, countdown timers, or emphasizing scarcity.
6. Use social proof:
Incorporate social proof like customer testimonials, reviews, and case studies to build customer credibility and trust.
7. Test and optimize:
Continuously test and optimize your messaging to improve your conversion rates. Use A/B testing to try out different headlines, calls to action, and messaging to see what resonates best with your audience.
And if you’re tired of writing sales funnel copy from scratch, make sure to check out all of the amazing templates in the Damn Copy Shop or have AI do it for you in minutes with the amazing Marketing Magic App!
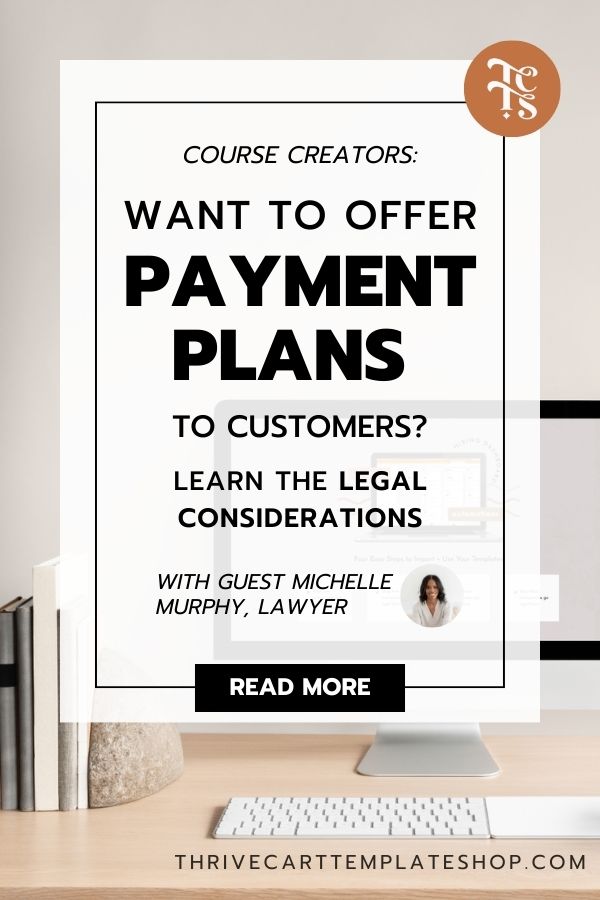
Do you offer payment plans or are considering offering buy now, pay later (BNPL) plans to your customers? Payment plans are becoming more and more popular for small business owners who sell courses/digital products and services.
Offering payment plans are a great way to boost sales and customer loyalty. Before you start offering those plans, it's important to understand that offering payment plans also comes with legal risks that businesses need to be aware of. In this article, we'll dive into ways you can offer payment plans to customers and the legal issues that come with them. By understanding what’s involved in offering installment plans and the legal obligations that come with it, you can protect your business and your customers while making the most of this popular payment option. Here's what to consider when offering payment plans in your online business.
Which provider you'll use when offering payment plans
When choosing a BNPL provider for your business, there are several factors to consider. One of the most important is compatibility with your e-commerce platform. You'll want to choose a BNPL provider that integrates seamlessly with your platform, making it easy to offer the BNPL option to your customers. In addition to compatibility, it's important to consider the fees and costs associated with the BNPL provider. BNPL providers typically charge fees for their services, such as transaction fees and interest rates. Some providers, like Sezzle, offer a zero-interest payment plan, which can be an attractive option for customers. If you have Paypal as a payment option, they have their own installment plan called “Pay in 4” that will be offered if your client qualifies.
Some other popular BNPL providers you may want to consider include Afterpay, Klarna, and Affirm. Make sure to do your research and compare different providers to find the one that best fits your business needs and offers the most value to your customers. By choosing the right BNPL provider, you can offer a convenient and attractive payment plan option to your customers while increasing sales and customer loyalty.
NOTE FROM THRIVECART TEMPLATE SHOP:
If you have enabled Paypal as a payment processor for your product in Thrivecart, your customers will have the option to do “Pay in 4” in most instances. If you are using the Stripe Enhanced payment processor for your product in Thrivecart, they will see the best BNPL provider based on their location; for USA it could include Afterpay, Klarna or Affirm; for other countries, you may see less options or country-specific options. Contact Thrivecart support here with country-specific questions for BNPL for Stripe Enhanced.
How to Set Up Payment Plans for Customers
You may also benefit from a checkout system like Thrivecart or Samcart. These checkout systems offer a range of features such as one-click upsells, order bumps, and customizable checkout pages, which can help you increase your average order value and improve the overall customer experience. Additionally, they offer various payment integrations, including PayPal and Stripe. Thrivecart and Samcart both have user-friendly interfaces that make it easy for you to set up and customize your checkout process, even if you don't have any technical knowledge. They also offer various analytics and reporting tools, allowing you to track your sales data and optimize your checkout process over time.
You can also create your own payment plans with these systems to accommodate different payment preferences and enhance the customer experience. Unlike the ones above, if a payment fails in Thrivecart or Samcart, you won't collect all of your funds up front and you'll need to follow up with customers on your own to get paid.
Consumer protection laws when offering payment plans to customers
If you're considering using payment plans for your business, it's important to understand that these services are considered a type of credit and are subject to various consumer protection laws.
Here are some of the laws you'll need to comply with when you're offering a payment plan option.
Truth in Lending Act (TILA)
TILA requires lenders to disclose certain information about credit terms and costs to consumers. This includes the total amount financed, the annual percentage rate (APR), the finance charge, and the total payments required. BNPL services must comply with TILA disclosure requirements and provide consumers with a clear and accurate understanding of the terms and conditions of their credit.
Say you're selling an online course for $1,000. You offer two payment options to your customers: they can either pay in full at the time of purchase or they can pay in four monthly installments of $300 each.
If a customer chooses the installment plan, they will pay a total of $1,200 ($300 x 4) over the four-month period, which includes an additional charge of $200 on top of the original $1,000 price.
In this scenario, TILA would apply to the installment payment plan, but NOT to the payment in full option. This is because the installment plan involves extending credit to the customer and charging an additional fee, which is considered a finance charge under TILA.
As the seller, you would need to comply with TILA's disclosure requirements for the installment payment plan. This would include providing customers with a written disclosure statement that outlines the finance charge, APR, payment schedule, and any other fees or charges associated with the credit.
Payment Plan Disclosure Requirements
When you offer payment plans to your customers, you want to make sure they have all the information they need to make the right decision for their finances. That's why disclosure requirements are in place to protect consumers and help them understand the fees, interest rates, and repayment terms associated with payment plans.
One of the most important disclosure requirements for payment plans is providing clear and easy-to-understand information on fees. That means making it crystal clear to your customers what fees they'll be charged, like transaction fees or late fees. By being upfront about fees, customers can make informed choices about whether a payment plan is the right option for them.
Another critical disclosure requirement for payment plans is providing clear information on interest rates. This includes letting customers know the annual percentage rate (APR) and any other interest charges that may apply. By giving customers a clear picture of the interest rates, they can make informed decisions about the cost of using payment plans and whether they can afford it.
Lastly, payment plans must provide clear information on repayment terms. This includes information on the total amount due, the due date, and any penalties that may apply if payments are missed. By providing clear repayment terms, customers can understand exactly what they're getting into when they use payment plans and can make informed decisions about whether they can manage to pay back what they owe. If you're using a provider like Klarna, Paypal, or Sezzle, they've handled this on the backend. However, if you're providing your own payment plans that cost more than paying in full, you'll have to create the disclosure yourself.
Wondering what this looks like, here's an example:
“By selecting this payment plan option, you agree to pay a one-time transaction fee of $5.00, plus a late fee of $10.00 if your payment is more than 10 days late. The annual percentage rate (APR) for this payment plan is 15%. If you make all payments on time, you will make a total of 4 payments of $50.00 each, for a total amount of $200.00. If you miss a payment, the total amount due will be adjusted accordingly. Payments will be due on the 1st of each month, and penalties for missed payments will apply. By using this payment plan, you agree to the terms and conditions outlined in the agreement.”
By providing clear and transparent information about fees, interest rates, and repayment terms, you're giving your customers the power to make smart financial decisions. It's not just a legal requirement – it's also a way to build trust with your customers and help them feel confident about using payment plans.
Data Privacy and Payment Plans
If you're offering payment plans to your customers, you want to make sure their personal and financial information is safe and sound. One way to do that is by having a privacy policy in place that tells them how you collect, use, and protect their data.
Think of a privacy policy like a guidebook on data collection for your customers. It explains what information you need to collect (like their name, address, and credit card number), how you collect it (maybe through an online form or over the phone), and what you do with it (like processing their payments and keeping track of their order).
Having a privacy policy shows your customers that you take their privacy seriously. It helps them feel more comfortable sharing their information with you because they know you're doing everything you can to protect it. Plus, it's required by law in many places, so it's important to have one.
Your privacy policy should also give customers some control over their information. For example, you might offer an option to opt-out of marketing emails, or let them know how to update their personal details or delete their information altogether.
Overall, having a clear and transparent privacy policy can help you build trust with your customers and protect their personal and financial information. It also shows that you're committed to data privacy and security. So take the time to create a privacy policy that's easy to understand and covers all the important details.
Debt Collection and Default
When offering payment plans to customers, it's important to understand the debt collection and default issues that can arise. If payments are not made on time or in full, debt collection efforts may become necessary.
In the event of a default, customers may be subject to collection efforts, such as phone calls, emails, or letters demanding payment. It's important to note that providers of payment plans are legally required to comply with fair debt collection practices, such as those set forth in the Fair Debt Collection Practices Act (FDCPA) in the United States.
The FDCPA provides guidelines for debt collection practices, including restrictions on when and how debt collectors can contact customers, as well as prohibitions against harassment, false statements, and other unfair practices. Providers of payment plans must comply with these guidelines when attempting to collect on delinquent accounts.
In addition to legal requirements, customers can take steps to protect themselves from debt-related problems when using payment plans. This includes having terms and conditions of the payment plan before your customer agrees to it.
Your terms and conditions should include:
Payment Schedule: Provide a clear schedule of payments that customers will be required to make under the payment plan. This should include the total amount due, the number of payments required, and the due dates for each payment.
Interest and Fees: Clearly outline any interest rates, fees, or penalties that may be charged under the payment plan. This can include late fees, transaction fees, or other charges that may apply.
Default and Collection: Explain what will happen if a customer defaults on a payment or fails to meet the terms of the payment plan. This can include information on late fees, penalties, and the potential for debt collection efforts if the account becomes delinquent.
Modifications and Cancellation: Specify whether customers can modify or cancel the payment plan, and under what conditions. This can include information on any fees or penalties that may apply if the payment plan is canceled.
It's also important to understand the consequences of defaulting on payments. These consequences can include late fees, penalties, and damage to credit scores. In some cases, debt collection efforts may escalate to legal action, such as a lawsuit to recover the amount owed.
Again, if you're using a service like Afterpay or Klarna, they'll handle debt collection issues, while you get paid upfront. But if you're using a checkout system like Thrivecart and offering payment plans for purchases on your own accord, you'll have to handle debt collection.
For providers offering payment plans, complying with legal requirements and providing clear and transparent information about debt collection practices can help build trust with customers and protect against potential legal issues.
Conclusion: What to consider when you offer a payment plan to customers
Offering payment plans to customers can be a great way to increase sales and improve customer satisfaction. However, it's important to understand the legal considerations associated with payment plans and to comply with all applicable laws and regulations. This includes providing clear and transparent information on fees, interest rates, and repayment terms, protecting customer data privacy and security, complying with fair debt collection practices, and having clear and concise terms and conditions for the payment plan.
By taking these steps, businesses can protect themselves from legal liability and build trust with their customers.
Michelle Wilson Murphy is a small business attorney who works with online business owners to legally protect their content and business using simplistic and effortless methods to achieve compliance.
She is the owner of The CEO Legal Loft where she offers contract templates and other legal resources designed to help online businesses protect themselves and comply with legal requirements. Whether you're just starting out or looking to expand your business, she's a great resource to help you achieve your goals while minimizing legal risk.
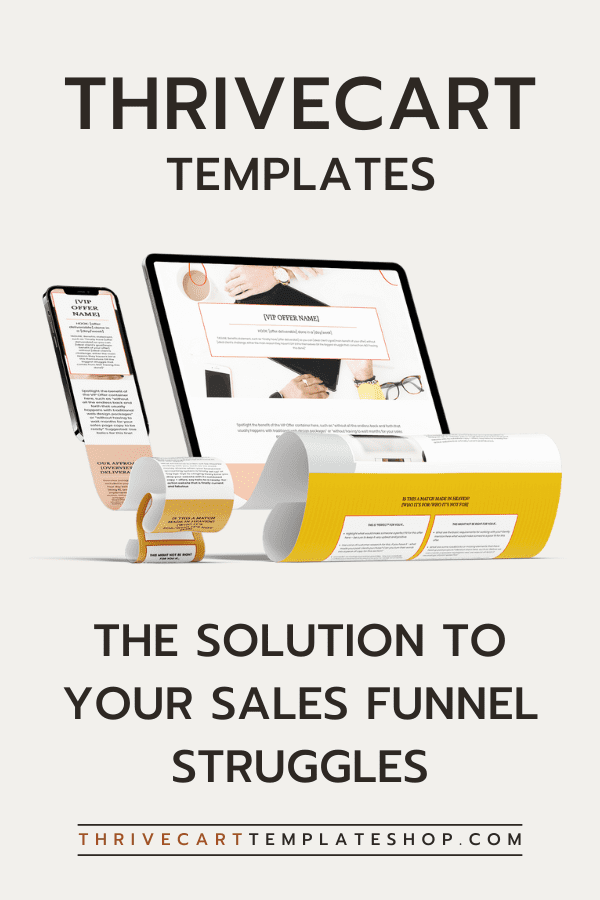
As a course creator or coach, you likely know the benefits and financial impact of a well-designed sales funnel to guide your potential customers through the buying process. However, creating a sales funnel from scratch can be a daunting task that requires time, effort, and expertise. That's why I created the ThriveCart Template Shop, a collection of customizable, mobile-optimized funnel templates designed to make the process of building a sales funnel easier and faster.
Why I Created The ThriveCart Template Shop
As an experienced marketer, I have helped many clients build successful sales funnels that have generated high conversions and revenue. However, I noticed that many entrepreneurs and small business owners struggled to create sales funnels themselves for their specific business needs, yet weren’t in a position to hire a funnel strategist or funnel builder.
Some folks get stuck on the technical aspects of building a funnel, aren’t confident in their design skills to create one from scratch, or didn't have the budget to hire a professional marketer to do it for them.
That's when I decided to create the ThriveCart Template Shop. I wanted to provide entrepreneurs and small business owners with an affordable and efficient solution to their struggles with sales funnels, and demystify Thrivecart along the way. My goal was to create a collection of high-quality ThriveCart templates that could be easily customized to fit any business's needs and goals.
Because, let’s face it, most ThriveCart templates are kinda ugly and basic. Our templates are the only premium, high-end Thrivecart templates in the market, designed to look professional and attractive, as well as conversion optimized so you never have to worry if your design is costing you sales.
Who My ThriveCart Templates Are For
My ThriveCart templates are designed for entrepreneurs, small business owners, and marketers who want to create a high-converting sales funnel without the hassle of starting from scratch. Whether you're just starting out in your business or looking to optimize your existing sales funnel, my templates can help you save time, money, and effort. One fun bonus is if you’re tired of paying LeadPages or some other page builder to host your sales pages, you can just use Thrivecart and say BYE to your page builder subscription.
My templates are also ideal for those who want to launch a new product or service quickly. With my templates, you can have a fully functional sales funnel up and running in no time. All you need to do is customize the templates with your own branding and messaging, and you're ready to launch.
Here are a few of the ThriveCart sales page and funnel templates in the shop right now:
Creating a sales funnel from scratch can be a time-consuming and expensive process. It requires technical skills and expertise that many entrepreneurs and small business owners don't have. Even if you have the technical skills, creating a sales funnel that works for your business can still take weeks or even months. The words on your pages – your sales copy – should be strategic and intentional, guiding the reader through a journey that leads to purchasing.
My templates are pre-designed and pre-tested to ensure high conversions and revenue. All you need to do is customize them with your own branding and messaging, and you're ready to launch. My templates include everything you need to create a high-converting sales funnel, including landing pages, checkout pages, upsell pages, thank-you pages, and more.
How to Easily Customize ThriveCart Templates
Customizing my ThriveCart templates is a straightforward process that anyone can do, even if you don't have any technical skills. All you need to do is follow these simple steps:
Customize the templates with your own branding, messaging, and product information.
Test the sales funnel to ensure everything works as expected.
Launch your sales funnel and start generating revenue!
Final Thoughts
Building a sales funnel is essential for any business that wants to generate revenue and grow. However, creating a sales funnel from scratch can be a daunting task that requires time, effort, and expertise. That's why I created the ThriveCart Template Shop, a collection of customizable templates designed to make the process of building a sales funnel easier and faster.
My templates are ideal for entrepreneurs, small business owners, and marketers who want to create a high-converting sales funnel on ThriveCart without the hassle of starting from scratch. With my templates, you can save time, money, and effort.
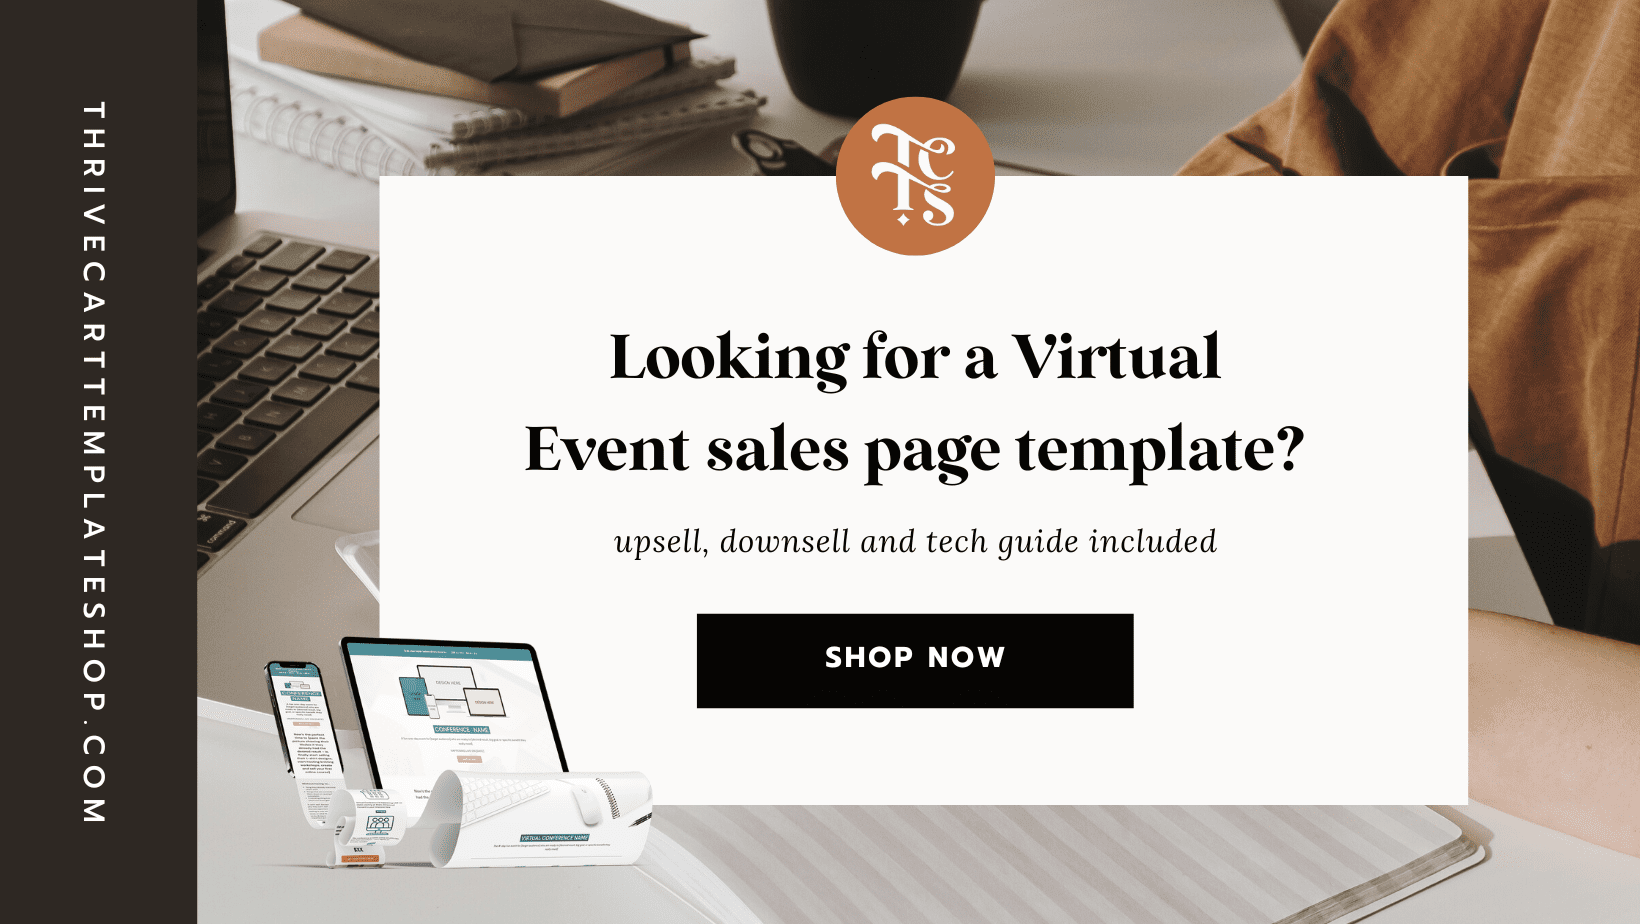
Let’s be honest, there isn’t much that ThriveCart can’t do. Did you know you can even host a virtual summit using ThriveCart and ThriveCart Learn? If you’re already using ThriveCart in your business, you don’t need to spend money on fancy virtual summit software or a different virtual summit platform. Using ThriveCart will make your entire virtual summit experience much easier for both yourself and your attendees.
Step-by-Step Guide: Host a Virtual Summit in ThriveCart
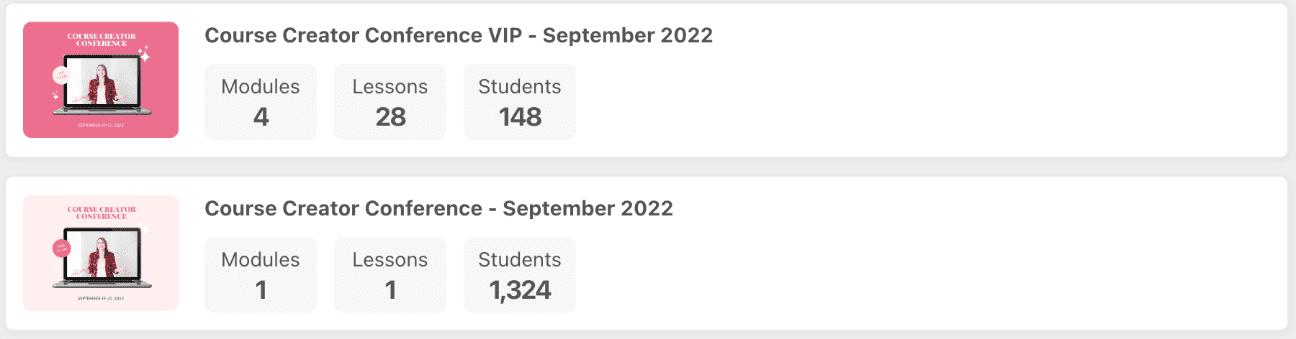
Thanks to Tara for sharing screenshots of how she’s created her annual Introvertpreneur Virtual Summit using ThriveCart and ThriveCart Learn.
If you have ThriveCart Learn Plus, you could create one Learn product and use tags, but from experience, this process isn’t as streamlined as it could be.
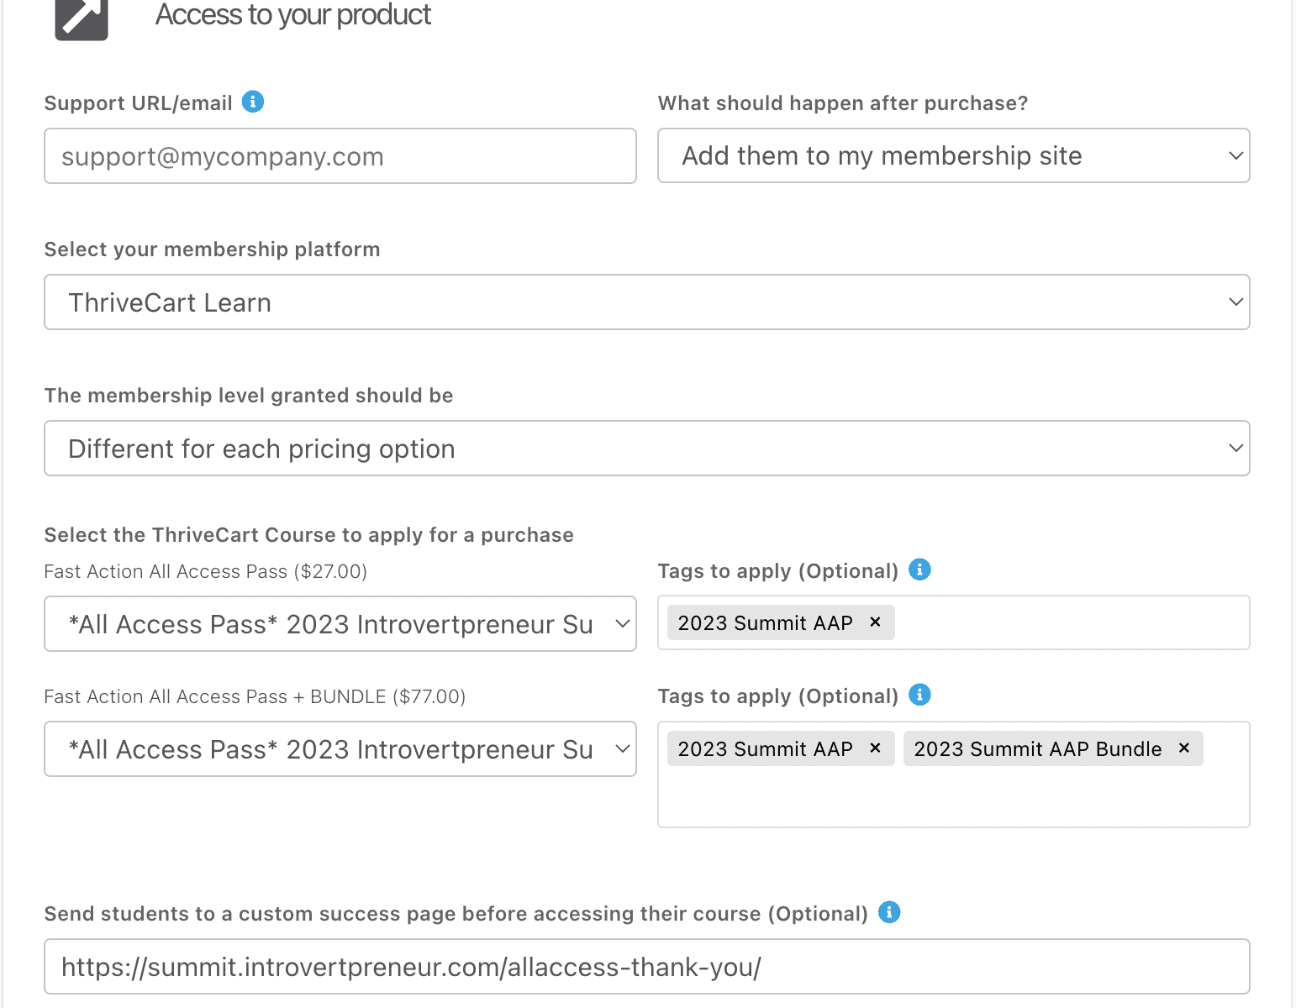
The best option is to create 2 access products in Learn. One for free attendees and one for VIP attendees who have purchased an all-access pass (AAP). Using this method, you’ll want to create the VIP Learn product first and build out all of the pages (lessons).
Most likely, this would look like a welcome lesson that is published – for people who register before the summit begins. Give them the essential information they’ll need – a calendar of events, how to contact you, links to the community or Facebook Group, etc.
Then, you’ll want to create all of the additional lessons for each speaker presentation and a lesson for any VIP goodies or extras. These pages can be created and saved as drafts until you’re ready to release them.
Once most or all of the presentations are added, you can easily duplicate this product to create the free ticket access product in Learn. You’ll just need to remove the extra VIP goodies lesson from the duplicate product.
Extra tip: Make sure you consider the product names so it’s clear to buyers.
This is especially important because if people upgrade after, they might have both products showing in their dashboard. Having clear names will ensure VIPs enter the correct product for their extra bonuses and watch time.
2) Create Your ThriveCart Products
The next step is easy, you’ll create your normal ThriveCart products for checkout. Depending on how your virtual summit and all-access pass are set up, you might need 3 products created:
$0 Product for Free Ticket Attendees
This free product will replace an opt-in form. Don’t add an upsell or funnel directly to the free product. If you do, it will require them to enter a credit card number for a $0 order and might result in fewer signups or lots of extra customer service requests.
Instead, you’ll want to have your success page redirect to the second ThriveCart product checkout page below.
Fast Action All-Access Pass
The second product you’ll want to create is a fast-action all-access pass checkout page. This is basically your upsell to encourage attendees to upgrade right away. Creating this as a second ThriveCart product, with a countdown timer that redirects after it expires, is a great way to build everything in ThriveCart.
Regular All-Access Pass Checkout Page
This is your virtual summit's normal all-access pass checkout page. When someone’s evergreen countdown timer runs out for the fast action pricing, you can set it to automatically redirect to this checkout page URL.
This is also the URL you’ll want to have linked on your sales page and in promo emails to encourage attendees to upgrade before the summit starts.
You can easily duplicate the Fast Action Product to create the regular checkout page. You’ll just need to remove the countdown timer, tweak some copy, and update the pricing.
3) Connect Your Tech
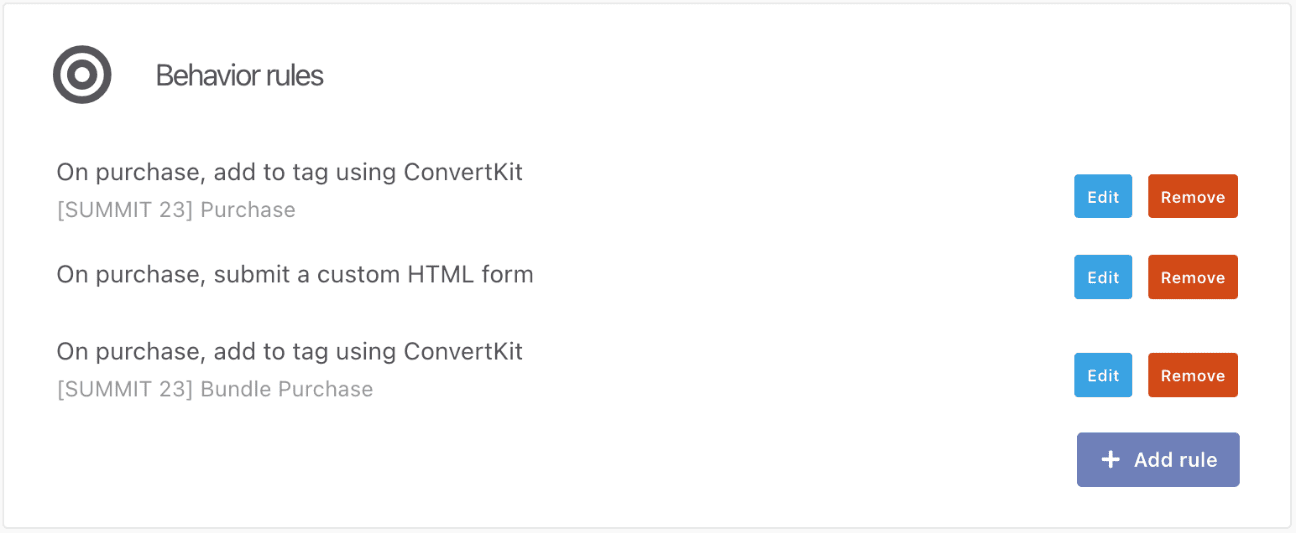
Once you have everything ready in ThriveCart Learn and the checkout pages are completed, it’s time to connect the tech (if you didn’t already)!
To automate things, you will just need to make sure each product is connected to the correct page redirection and the right ThriveCart product here:
Then, you’ll need to connect your email marketing provider under each product’s Behaviors tab:
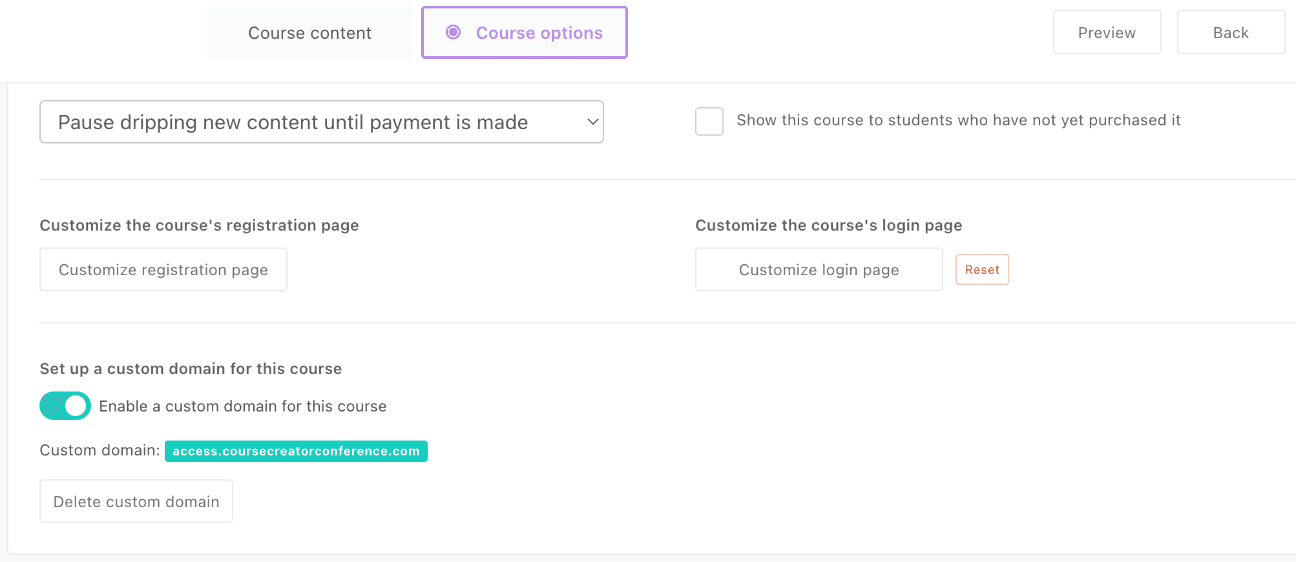
4) Add a Subdomain
Want to make it even easier for attendees to log into the summit? Set a subdomain on both ThriveCart Learn products for easy access.
For example: year.yourdomain.com
Don’t forget, you can also customize your login page to make it specifically branded for the virtual summit under Course Options.
5) Test Everything
Once the first 4 steps are complete and ready to go, it’s important to test everything before moving on to the next steps. In test mode, you can go through each product and create a test purchase to ensure everything works.
6) Add Your Affiliates
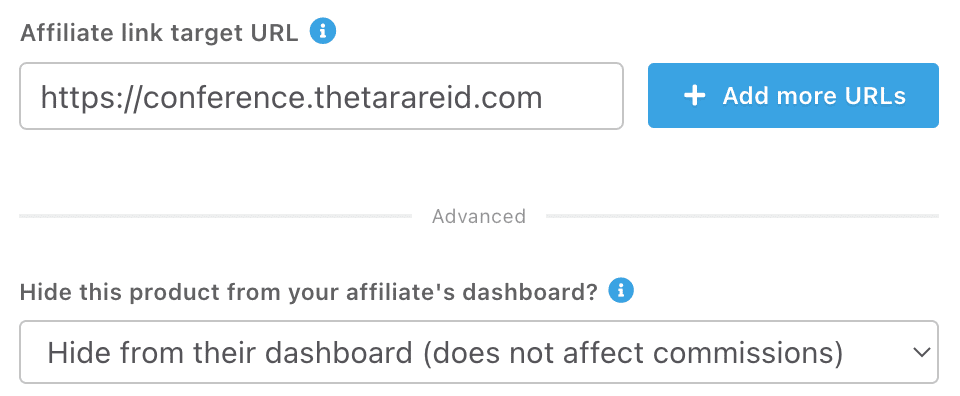
I like to do this next step here because as soon as you add affiliates (if you have auto-approvals turned on for affiliates), they’ll get a notification email immediately. But now that everything is set up and has been tested, we can go back into each ThriveCart product and turn on the affiliate option.
Extra tip: Make sure you hide 2 out of 3 ThriveCart products from your affiliate's dashboards so your affiliates aren’t confused about which product or link to share.
You’ll also want to update the affiliate link so it goes to your actual main registration page for the virtual summit:
7) Add Your Speakers to ThriveCart Learn
If you’ve offered your speakers a free VIP ticket, you’ll want to add them to Learn. You can either provide them with a 100% off coupon code to sign up themselves or add them directly to Learn by importing all speaker info in a CSV file.
8) Managing Your Virtual Summit in ThriveCart Learn
You have your virtual summit officially set up using ThriveCart and ThriveCart Learn!
But I wanted to touch on a few things to make managing the summit a little bit easier.
The first thing is to set reminders to publish/unpublish lessons each day of the summit or as needed for access limits for free ticket holders. This is the main reason why it’s better to create 2 different Learn products, as I shared in step one of this blog post. It means you won’t have to mess with the VIP Learn product, just the free ticket Learn product.
Another fun tip is to remember that you can embed anything into Learn – not just videos.
Want to embed questionnaires or feedback forms under each presentation? You can do that! I personally would embed an Airtable form for this.
Want to embed a chat box for each presentation? No problem!
Need more in-depth tutorials or summit strategy? Be sure to check out this free masterclass from my friend and summit expert Krista Miller from Summit in a Box.
Business retreats are a great way to grow your business and add an additional revenue stream. Retreat attendees love to connect in person, brainstorm new ideas, and find creative solutions to their business challenges. But planning and executing a successful business retreat can be a daunting task. With the right planning and execution, however, you can create a fantastic retreat that your audience won’t soon forget.
What is a Business Retreat?
A business retreat is an in-person event where attendees come together to discuss business issues, brainstorm solutions, and connect. Business retreats are often held in a retreat-like setting such as a hotel, resort, Airbnb, or conference center. A business retreat aims to provide a distraction-free environment where people can come together.
Business retreats are often seen as a luxury but can be an important part of your business model. By taking your attendees away from the office and out of their comfort zone, you create a space for creativity and collaboration that would otherwise be difficult to achieve.
Plus, a well-planned business retreat can be an effective audience-building exercise and can help to strengthen relationships among your attendees.
Benefits of Hosting Business Retreats
Hosting business retreats can have a number of positive impacts on your business. First, a business retreat can strengthen relationships among your attendees. Having everyone come together in a new setting and discuss business issues can create a strong bond among your retreat attendees.
Second, business retreats can be an effective way to show up as an expert and build the know, like, and trust factor.
Third, business retreats can make money! They are an excellent way to nurture your audience and add an extra revenue stream to your business.
Finally, business retreats can be a great way to expand your reach. By having people from different industries and backgrounds attend your retreat, you can open up new opportunities and make valuable connections that could help to grow your business.
How to Plan a Successful Business Retreat
Planning a successful business retreat can be daunting, but with the right planning and execution, you can create an amazing retreat that your attendees won’t soon forget.
Here are a few tips for planning a successful business retreat:
1) Location, Location, Location
When choosing a retreat location, it’s essential to consider your audience's needs. You want to select a location that is both enjoyable and conducive to productivity. Look for places that offer plenty of options for activities, good food, and comfortable accommodations.
2) Create a Retreat Agenda
An effective retreat agenda should include a mix of activities, discussions, and downtime. This will give your retreat attendees time to relax, have fun, discuss business issues, and brainstorm solutions.
3) Budget Planning for Your Retreat
Hosting an in-person retreat can be costly. Having a budget will help you avoid the biggest retreat mistake and ensure you don’t overspend.
4) Promote Your Retreat
Once you’ve created your retreat budget and agenda, it’s time to start promoting your retreat. This can be done through social media, email, or even direct mail.
5) Create an Event Landing Page
Next, create an event landing page for your retreat. An event landing page will provide your attendees with all the information they need to know about your retreat, such as the location, agenda, and budget. If you use ThriveCart, I have a conversion-optimized in-person retreat sales page template just for you!
Once your attendees have arrived at the retreat, it’s important to create a great retreat experience. This means providing comfortable accommodations, good food, and plenty of activities to keep your attendees engaged and motivated.
This is where knowing your audience is especially important.
What is something that could up-level their retreat experience? Consider arranging transportation from and to the airport to make their experience a good one right from the start, partnering with a local photographer to snap photos or take headshots as a nice bonus, creating a welcome basket for each attendee, or planning an excursion.
Tips for Creating an Effective Retreat Agenda
Creating an effective retreat agenda is key to ensuring a successful retreat.
Here are a few tips for creating an effective retreat agenda:
First, ensure that there is a mix of activities and discussions. This will give your attendees time to relax, have fun, discuss business issues, and brainstorm solutions.
Second, designate time for team-building activities. Team-building activities can help strengthen your attendees' relationships and create a more cohesive retreat environment.
Third, include time for reflection. Reflection time will allow your attendees to take a step back and evaluate their progress during the retreat and discuss areas for improvement.
Fourth, include time for goal setting. Goal setting will give your attendees a sense of direction and purpose and help ensure the retreat is productive.
Fifth, create time for feedback. Feedback will help ensure everyone at the retreat is heard, and ideas are discussed and evaluated.
Finally, make sure that the agenda is flexible. This will allow your attendees to adjust and adapt to changing conditions and ensure the retreat is productive and enjoyable.
Tips for Retreat Promotion and Event Landing Page
Once you’ve created your retreat budget and agenda, it’s time to start promoting your retreat.
Here are a few tips for retreat promotion and creating an event landing page:
First, use social media to promote your retreat. This will allow you to reach a wide audience and get the word out about your retreat.
Second, create a promotional video. A promotional video will help to generate excitement and anticipation for your retreat. And as we know, video is king, especially when you are selling an experience!
Third, create an event landing page. An event landing page will provide your attendees with all the information they need to know about your retreat, such as the location, agenda, and budget.
Fourth, create an email campaign to promote your retreat. An email campaign will help ensure your audience is aware of the retreat and excited to attend.
Fifth, use paid advertising to promote your retreat. Paid advertising can reach a wider audience and get the word out about your retreat.
Finally, do you use ThriveCart? Grab my Retreat Sales Funnel Template for Thrivecart to get your in-person retreat sales page up and running in minutes! ThriveCart is the perfect platform for creating an event landing page and managing your retreat sales. With ThriveCart, you can easily create a professional event landing page that will increase sales!
Extra Retreat Planning Templates and Resources:
I’ve rounded up some of the best retreat planning templates and resources for you to make retreat planning a lot easier!
Business retreats can be a great way to connect with your audience in person. But planning and executing a successful business retreat can be a daunting task. With the correct planning and execution, however, you can create an amazing retreat that your attendees won’t soon forget. If you’re looking to make your next business retreat a huge success, then use the tips outlined in this article to get started.
And don’t forget to use ThriveCart. Grab my Retreat Sales Funnel Template for Thrivecart to get your in-person retreat sales page up and running in minutes!
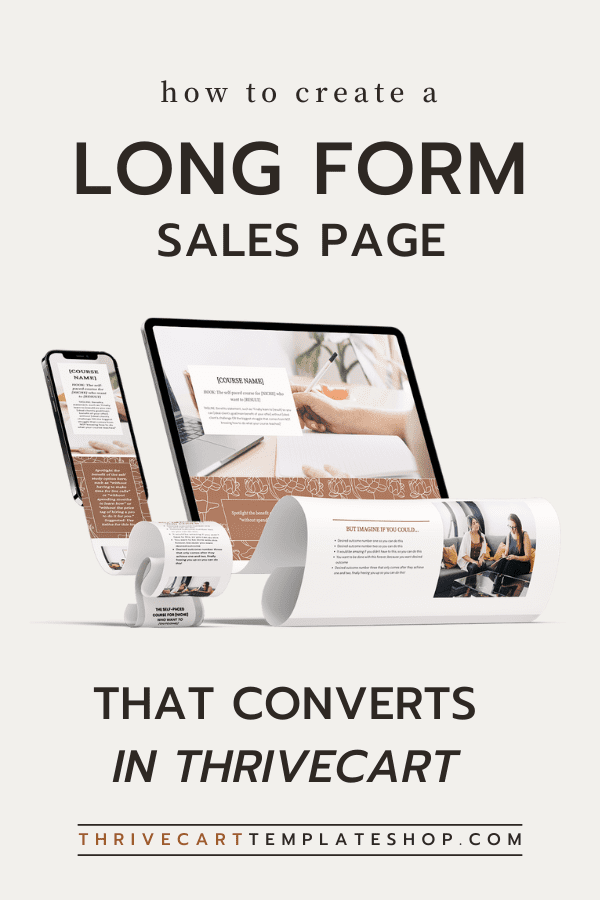
When you first get started with ThriveCart, it might be hard to picture designing your own long form sales page on ThriveCart. It’s just for quick checkout pages, right? Wrong! That’s exactly why I first launched the ThriveCart Template Shop – to show you what’s possible with ThriveCart. In this blog post, we’ll cover how to create a long form sales page that converts in ThriveCart and some sales page design tips.
Short Form vs. Long Form Sales Page
One big question you might have about sales pages is, ‘what’s the difference between a short form vs. a long form sales page?’ or even ‘what type of sales page do I need for my offer?’
A short-form sales page is like the Cliff Notes version of a sales page – short and sweet. It's a condensed version that gets straight to the point and provides the essential information about a product or service without any fluff, or really, room for very much sales copy. These pages are great for products that are simple and require less explanation, or when you’ll be sending piping hot leads to a page, such as after a sales call or high-converting webinar.
On the other hand, a long-form sales page is like the director's cut of a sales page. It's a more comprehensive overview of a product or service, with lots of detailed information and multiple sections, plus plenty of room for persuasion and conversion copy. These pages are perfect for more complex products requiring a more in-depth explanation.
Long-form sales pages often use storytelling, testimonials, and other persuasive techniques to help potential buyers to make a purchase. They're like a sales pitch in written form, designed to get you excited about a product or service and answer as many of your questions as possible.
Ultimately, the choice between the two depends on the product or service being sold and the intended audience. A short-form sales page might be the way to go if you're selling something simple and straightforward, or you’ll only be sending folks that link after they’ve already decided to buy. But if you're selling something more complex or expensive, a long-form sales page can help convince potential buyers that it's worth the investment.
ThriveCart Sales Page Design Tips
Now that you know whether you need a long form sales page or not for your offer, how can you design one in ThriveCart? ThriveCart is so much more than just a quick checkout page tool.
Templates save you time, and who wants to start every new sales page from scratch? Not me! That’s why I created all of the ThriveCart templates in the shop. You’ll find a wide collection of conversion-friendly ThriveCart sales page templates for quickly creating your long form template. And in case you’re wondering, yes, I do use my own templates as a jumping off point when I create new products.
With any template, you’ll want to customize the design and make it your own. Maybe even duplicate some sections if you want to add even more sections to your sales page, and of course, delete any sections that don’t serve you or fit your offer.
White space is especially important for long form sales page design because there is so much information. Allowing plenty of white space in your design allows your visitors to scan the page quickly and not get overwhelmed with the amount of copy and sections.
Double Check the Design on Mobile
Something many people miss when using ThriveCart for their sales pages is double-checking the mobile view. Just click on the little smartphone icon in the top right corner to see how the entire page looks on mobile devices.
Use Great Visuals
Along with using white space, you want to use more visuals when building a long form sales page. Visuals allow you to break up long bits of text and make the page much more user-friendly.
Some of my favorite powerhouse visuals to use on a sales page are:
Digital product mockups to help customers visualize exactly what they're purchasing. These break into two categories:
Simple digital product mockups you can create in Canva – I include more than a dozen editable templates for free with every template purchase from my shop
Lifestyle mockups where you simply place a screenshot of your product, course or training into an editable photo, almost always requiring Photoshop. Moyo Studios makes gorgeous lifestyle mockups
I like to use a mix of both digital product mockups and lifestyle mockups on my website and pages.
Final Thoughts
Now that you know the difference between short-form and long-form sales pages and which one might be right for your product or service, it's time to start designing your long-form sales page on ThriveCart! But don't worry, even if you're new to ThriveCart, designing a long-form sales page is easier than you might think.
To get started, we recommend using a template from our ThriveCart Template Shop. Templates are a great starting point and will save you a ton of time. Plus, you'll find a wide selection of conversion-friendly templates specifically designed for long-form sales pages.
As you customize your template, remember to utilize white space and include plenty of visuals to break up long blocks of text. And don't forget to double-check your design on mobile devices to ensure a seamless user experience across all devices.
With these tips in mind, you'll be well on your way to designing a long-form sales page that converts like a rockstar on ThriveCart.
When ThriveCart first came out with ThriveCart Learn, I was beyond excited and knew that it would change the game for course creators. Because ThriveCart Learn is still relatively new as a course platform, I get asked about it all the time. In this blog, you will learn everything you need to know about using ThriveCart Learn.
If you’re thinking about purchasing ThriveCart or switching your digital products and courses to ThriveCart Learn, keep reading!
What is ThriveCart Learn?
ThriveCart Learn is a course hosting platform from ThriveCart that was introduced in 2021. You can host courses, programs, digital products, and even memberships on ThriveCart Learn.
ThriveCart Learn Pricing:
ThriveCart Learn is included with your purchase of a lifetime ThriveCart account. The option to upgrade to the Learn+ version is available for an additional one-time price of $195.
ThriveCart Learn vs ThriveCart Learn Plus
What are some of the big differences between ThriveCart Learn and ThriveCart Learn+? I strongly recommend adding on the one-time upgrade to Learn+ because of these fabulous features included:
Bundles
You can easily create ‘bundles’ of products that someone will automatically be enrolled in by purchasing one product. This is an excellent feature if you want to sell bundles of products or automatically add access to a bonus.
Advanced Tagging and Sequences
With Learn+, you can tag certain purchasers and give them access to exclusive lessons (like for pay-in-full bonuses). There are many ways you can use the advanced sequences and tagging features!
Custom Subdomains
Want to have a custom subdomain for your courses and login? You can easily set this up in minutes with Learn+.
Student Imports
With Learn+, you can easily import students using a CSV file.
How to Use ThriveCart Learn and Learn Plus
ThriveCart Learn is super easy to use! Probably the most significant benefit of using ThriveCart Learn (especially if you’re already using ThriveCart for your checkout pages) is no recurring fee. For the same type of features, on Kajabi, for example, you could be paying upwards of $199 per month.
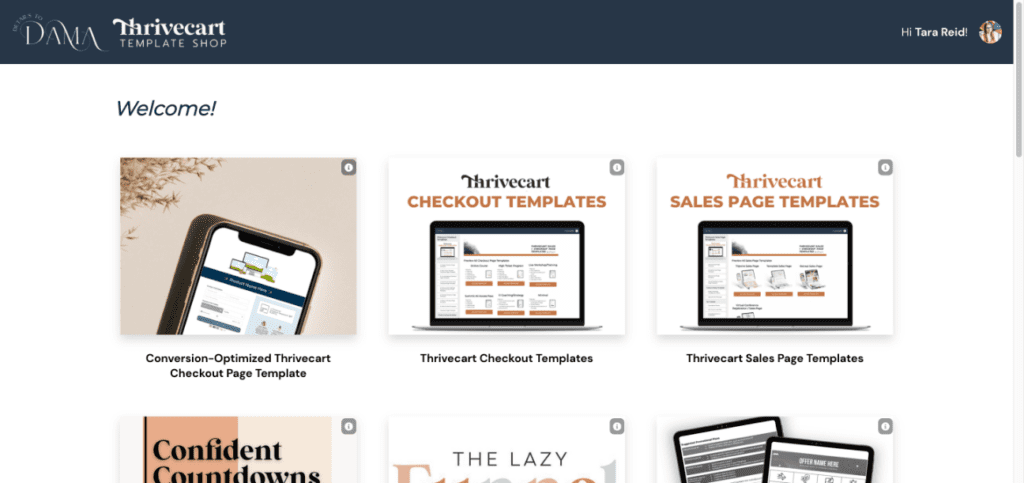
Here’s what it looks like when a student is logged in to my ThriveCart Learn Dashboard:
And here’s how I’ve branded some of my individual courses hosted on ThriveCart Learn:
Your Biggest ThriveCart Learn Questions:
1) Is it possible to easily import students from another course platform?
Yes! If you purchase the one-time upgrade of Learn+, you can easily import students from a CSV file.
2) Can you host a membership on ThriveCart Learn?
You can! You would set up your checkout pricing as a subscription model and host the membership content inside ThriveCart Learn. The only drawback to a membership is that ThriveCart doesn’t automatically figure out end dates.
For example: A customer signs up for an annual membership in March and cancels in August. They paid for a year, so they should still have access until the following March. However, ThriveCart removes access immediately. So, you might have to set up some back-end admin processes to make it work for you and your membership. See this article for tips on how to handle that.
3) How tech-savvy do I need to be to use ThriveCart Learn?
ThriveCart Learn is pretty easy to use once you get the hang of it. There are certain hacks you can learn to make things easier. If you get stuck, check out this epic resource for Thrivecart.
4) How can I add videos to lessons?
ThriveCart is not able to host videos. Any videos in ThriveCart Learn need to be embedded into the lesson from another video hosting service. The most popular options are Vimeo or, my personal choice – Screencast-O-Matic. I use it to record, edit and host all my course content..
5) How can I easily brand and customize ThriveCart Learn?
ThriveCart Learn is the most customizable course platform out there! You can customize everything to make it your own and match your brand. There are so many design settings!
Time-saving hack: For every new product you create – set up the branding, style, and various blocks as a ‘template lesson’ that you can duplicate. That way, all of your design settings are saved and will look cohesive.
ThriveCart Learn Review: Final Thoughts
I can’t recommend ThriveCart Learn enough! If you’re ready to say goodbye to the costly monthly fees and move things over to ThriveCart Learn – you won’t regret it. ThriveCart Learn is powerful, easy to use, and flexible – the perfect combination for your online course business.
Design and copywriting are two of the most important aspects of any website. In fact, they can make or break a website. This is especially true when it comes to the checkout page. You will lose sales if your checkout page isn't designed and copywritten well. This blog post will discuss 10 design and copywriting secrets that will help improve your checkout page!
Checkout Page Design & Copy: What Is More Important?
When it comes to website design and copywriting, there is no doubt that both are critical for a successful website or checkout page. In fact, they can make or break your site, especially when it comes to the checkout page.
Online shoppers are a fickle bunch. If they don't like your checkout page, they'll leave and never come back. That's why it is so important to design your checkout page well. But what are some of the critical elements that you should focus on?
10 of the Best Design & Copywriting Secrets for Checkout Pages
Let's discuss the best 10 copywriting and design secrets that will help increase your conversion rate and generate more revenue for your business!
1) Design: Clear Layout
Your checkout page should be easy to read, with straightforward typography and an uncluttered layout. This will help keep online shoppers engaged and interested in completing their purchases. With our conversion-focused templates, you can have your ThriveCart checkout page become your sales page. But remember where they are coming from. Did they already receive information on the previous page they would have landed on?
2) Copywriting: Concise & Informative Text
In addition to a clear design, your copy should also be concise and informative. Avoid long blocks of text that are hard to read and blend together. Instead, break up your copy with bullet points and distinct sections to help online shoppers get the information they need quickly and easily.
3) Copywriting: Testimonials & Customer Reviews
Online shoppers are constantly looking for social proof before making a purchase. Adding testimonials or customer reviews on your checkout page can give them extra confidence to purchase. And yes, a screenshot of a positive comment on social media is okay to add too – just be sure to get permission from the poster or blur their name and photo to respect their privacy.
4) Design: CTA Button Colors
Your checkout page should include a clear and prominent call to action button that stands out. This will help increase conversions and encourage online shoppers to complete their purchases on your site. You can use contrasting colors like red, orange, or bright backgrounds with a contrasting CTA button color to create eye-catching designs.
5) Copywriting: Focus On the Benefits
Your copy should focus on highlighting the benefits of your products or services rather than simply listing out all the features. By focusing on what your customers will get out of your offer or product, you will appeal to their actual needs and encourage them to make a purchase.
To further alleviate any concerns that online shoppers may have about making a purchase from your checkout page, consider including risk-free guarantees or money-back offers if you have such a policy in place. This can help give them extra peace of mind and increase sales in the process.
7) Design: Add Visuals or Videos
Visuals and videos are another great way to engage online shoppers on your checkout page and convince them to complete their purchase. Use stock photos, graphic elements, icons, or branded photos. You can also use product demos or customer testimonials to add a more personal touch.
My favorite stock photo subscription sites are Styled Stock Society and ColorJoy because both feature high quality images, women of color, and women of all builds and sizes. Bonus points to Styled Stock Society for their absolutely spectacular collections and Canva templates, and for Color Joy’s amazing license that allows template sellers like me to use their images in my designs. We proudly feature and include stock photos from ColorJoy in many of our templates.
8) Copywriting: Clear & Direct Call to Action
Your copy should also clearly and directly tell online shoppers what they need to do in order to complete their purchase. This will help increase your conversion rate by focusing on the action that you want them to take.
9) Design: Always Double Check Mobile
No matter where your checkout page is hosted or created, always check the mobile version. In ThriveCart, it might make more sense to move some sections around for the mobile layout. This can help display your checkout page in the best possible way and encourage online shoppers to complete their purchases.
Heads up: every Thrivecart checkout and sales page in our template shop comes fully mobile optimized, optimized and designed with conversions (sales) as the primary focus, and ready for traffic.
10) Copywriting: Know Your Ideal Audience
I've done some professional conversion copywriting in my years as a funnel builder, but these days I prefer to work with some fantastic copywriters. The most critical and essential step for good copy on a checkout page is to do your research. You need to know your ideal audience so you can speak to them in your copy.
This means knowing their pain points, their goals, and their desired outcomes. By doing this research, you can craft copy that speaks directly to your ideal audience and compels them to complete a purchase on your checkout page. With these tips and tricks in mind, you can create a high-converting checkout page that online shoppers will love.
Want to know the copywriting resources I love and recommend?
Sandra van der Lee from Damn Copy has some amazing copy templates ready for you to make your own. I’ve used and love her templates in launches before and been very happy with the results!
BONUS THRIVECART CHECKOUT PAGE TIP #11:
If you use ThriveCart, add a link to your main website on your checkout page (probably in the footer is best, especially if you’re linking to your privacy policy and/or your terms and conditions). This provides your potential purchasers with an added level of trust AND gives you a backlink to your domain. Backlinks are great for SEO (search engine optimization)!
Final Thoughts
If you're looking for a design-focused solution that will improve your checkout page and increase conversions, turn to ThriveCart today! With our user-friendly checkout page templates and copywriting secrets, we'll help you generate more revenue for your business.