
Let’s be honest, there isn’t much that ThriveCart can’t do. Did you know you can even host a virtual summit using ThriveCart and ThriveCart Learn? If you’re already using ThriveCart in your business, you don’t need to spend money on fancy virtual summit software or a different virtual summit platform. Using ThriveCart will make your entire virtual summit experience much easier for both yourself and your attendees.
Step-by-Step Guide: Host a Virtual Summit in ThriveCart
Thanks to Tara for sharing screenshots of how she’s created her annual Introvertpreneur Virtual Summit using ThriveCart and ThriveCart Learn.
Sidebar: if you haven’t explored Tara’s amazing collection of freebies, tap here to do that ASAP! I absolutely love her free Notion marketing promo planner and use it all the time!
1) Create Your ThriveCart Learn Access Products
If you have ThriveCart Learn Plus, you could create one Learn product and use tags, but from experience, this process isn’t as streamlined as it could be.
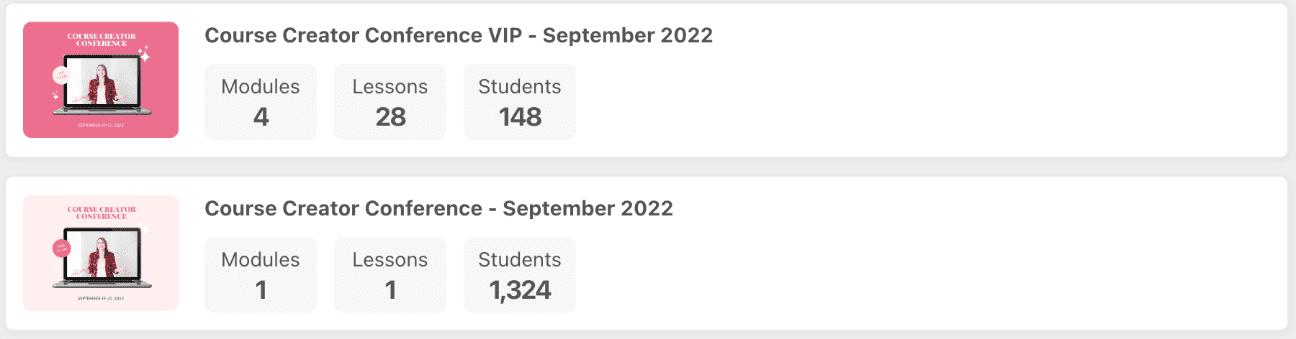
The best option is to create 2 access products in Learn. One for free attendees and one for VIP attendees who have purchased an all-access pass (AAP). Using this method, you’ll want to create the VIP Learn product first and build out all of the pages (lessons).
Most likely, this would look like a welcome lesson that is published – for people who register before the summit begins. Give them the essential information they’ll need – a calendar of events, how to contact you, links to the community or Facebook Group, etc.
Then, you’ll want to create all of the additional lessons for each speaker presentation and a lesson for any VIP goodies or extras. These pages can be created and saved as drafts until you’re ready to release them.
Once most or all of the presentations are added, you can easily duplicate this product to create the free ticket access product in Learn. You’ll just need to remove the extra VIP goodies lesson from the duplicate product.
Extra tip: Make sure you consider the product names so it’s clear to buyers.
This is especially important because if people upgrade after, they might have both products showing in their dashboard. Having clear names will ensure VIPs enter the correct product for their extra bonuses and watch time.
2) Create Your ThriveCart Products
The next step is easy, you’ll create your normal ThriveCart products for checkout. Depending on how your virtual summit and all-access pass are set up, you might need 3 products created:
$0 Product for Free Ticket Attendees
This free product will replace an opt-in form. Don’t add an upsell or funnel directly to the free product. If you do, it will require them to enter a credit card number for a $0 order and might result in fewer signups or lots of extra customer service requests.
Instead, you’ll want to have your success page redirect to the second ThriveCart product checkout page below.
Fast Action All-Access Pass
The second product you’ll want to create is a fast-action all-access pass checkout page. This is basically your upsell to encourage attendees to upgrade right away. Creating this as a second ThriveCart product, with a countdown timer that redirects after it expires, is a great way to build everything in ThriveCart.
Regular All-Access Pass Checkout Page
This is your virtual summit’s normal all-access pass checkout page. When someone’s evergreen countdown timer runs out for the fast action pricing, you can set it to automatically redirect to this checkout page URL.
This is also the URL you’ll want to have linked on your sales page and in promo emails to encourage attendees to upgrade before the summit starts.
You can easily duplicate the Fast Action Product to create the regular checkout page. You’ll just need to remove the countdown timer, tweak some copy, and update the pricing.
3) Connect Your Tech
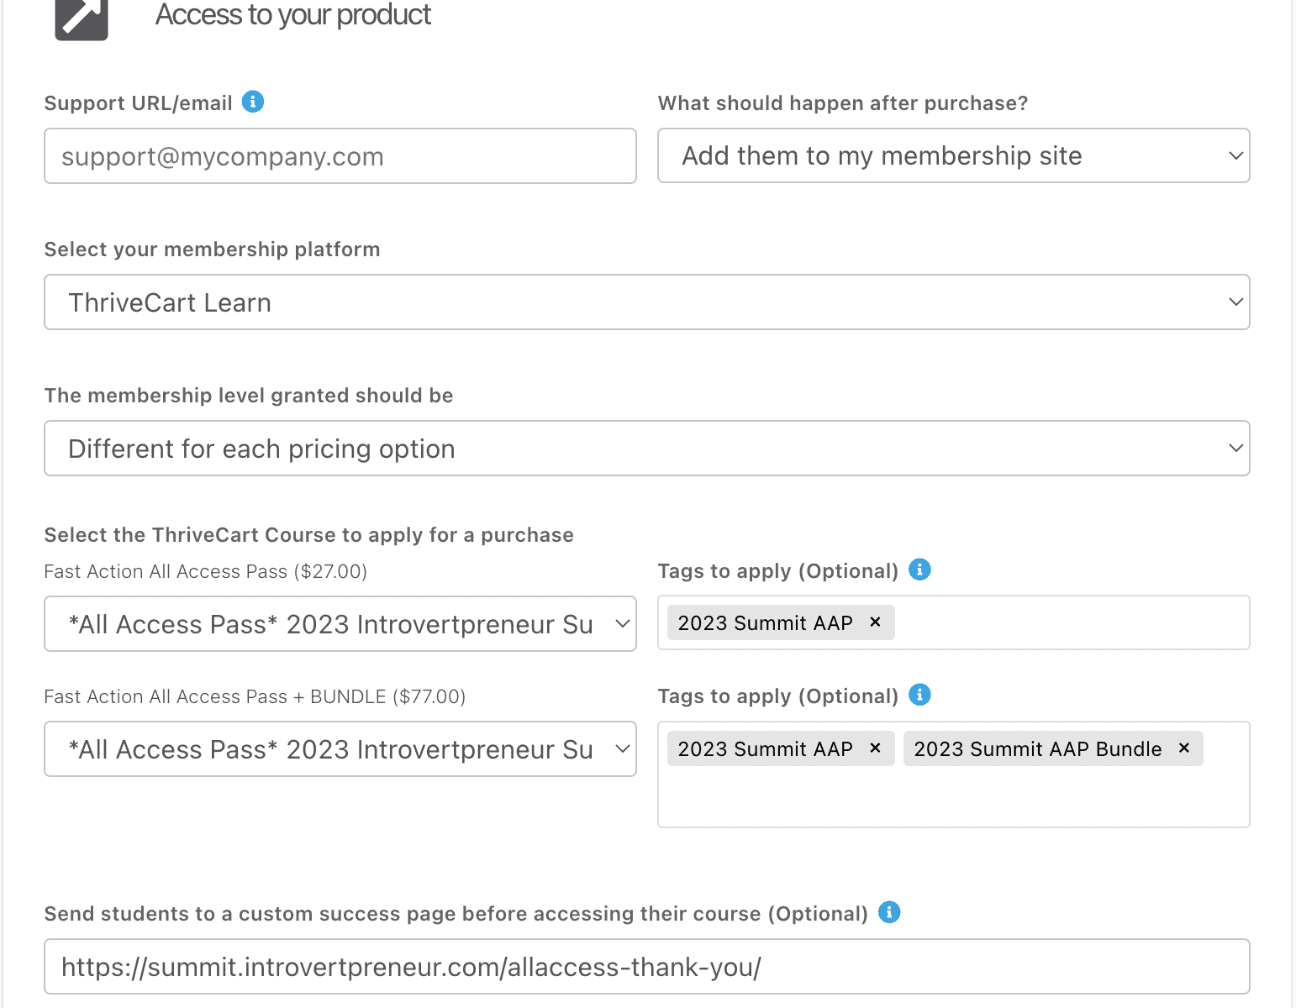
Once you have everything ready in ThriveCart Learn and the checkout pages are completed, it’s time to connect the tech (if you didn’t already)!
To automate things, you will just need to make sure each product is connected to the correct page redirection and the right ThriveCart product here:
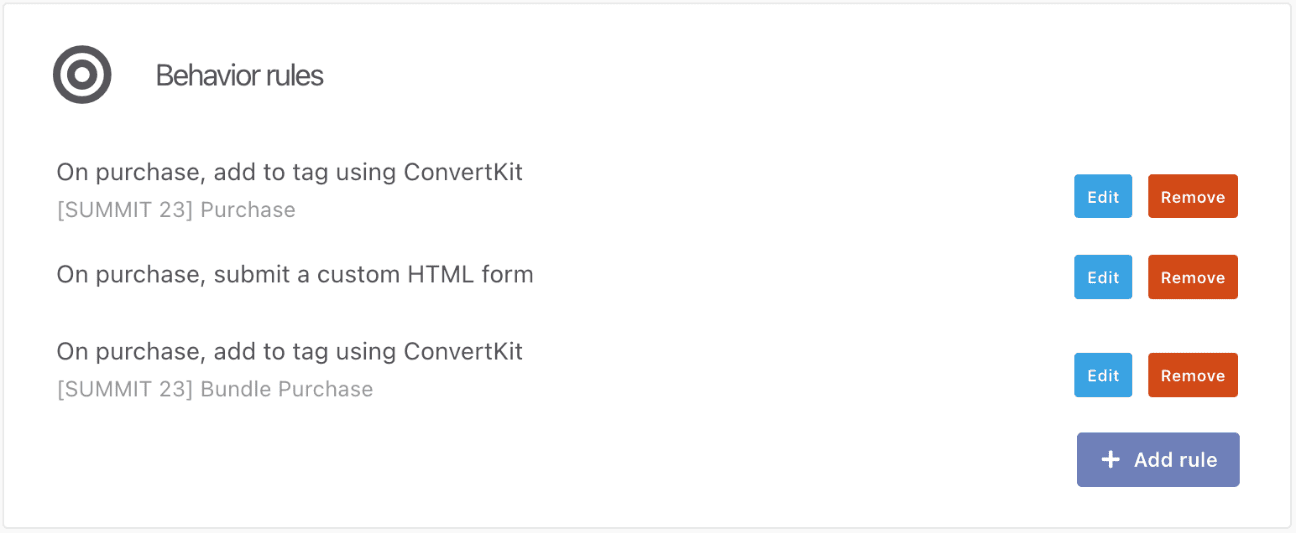
Then, you’ll need to connect your email marketing provider under each product’s Behaviors tab:
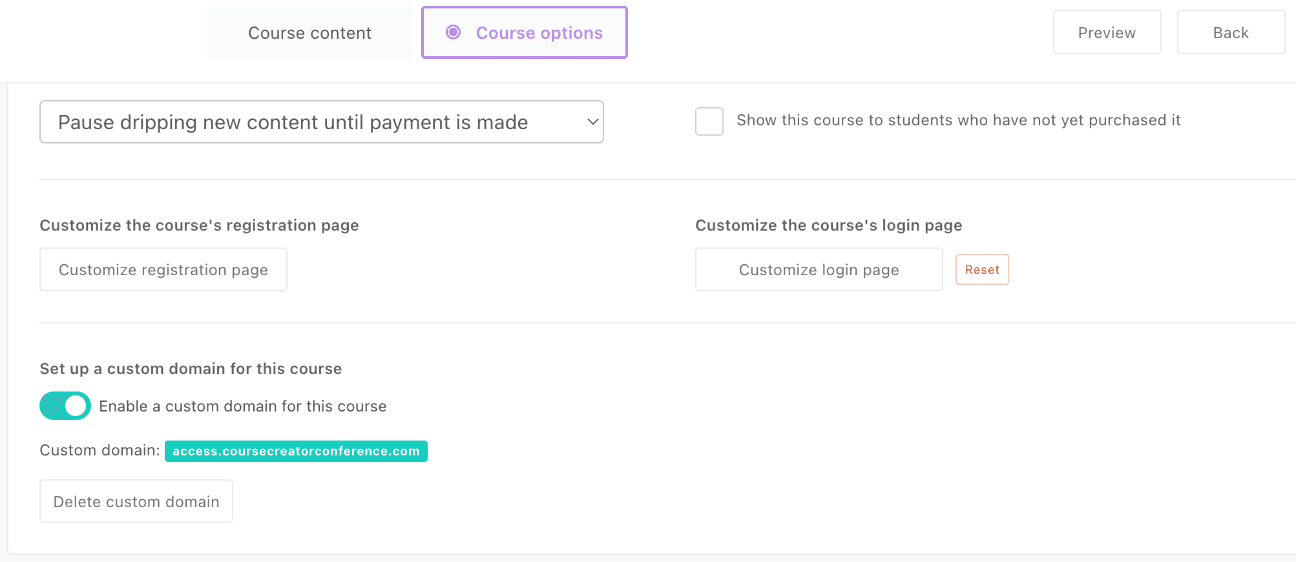
4) Add a Subdomain
Want to make it even easier for attendees to log into the summit? Set a subdomain on both ThriveCart Learn products for easy access.
For example: year.yourdomain.com
Don’t forget, you can also customize your login page to make it specifically branded for the virtual summit under Course Options.
5) Test Everything
Once the first 4 steps are complete and ready to go, it’s important to test everything before moving on to the next steps. In test mode, you can go through each product and create a test purchase to ensure everything works.
6) Add Your Affiliates
I like to do this next step here because as soon as you add affiliates (if you have auto-approvals turned on for affiliates), they’ll get a notification email immediately. But now that everything is set up and has been tested, we can go back into each ThriveCart product and turn on the affiliate option.
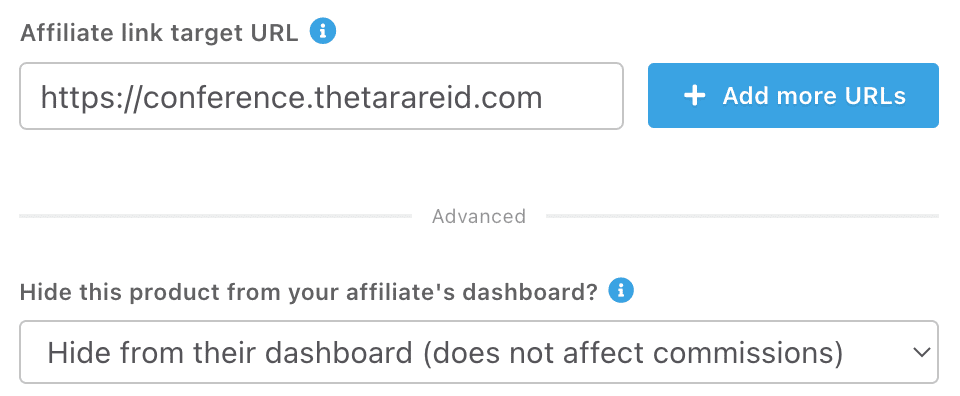
Extra tip: Make sure you hide 2 out of 3 ThriveCart products from your affiliate’s dashboards so your affiliates aren’t confused about which product or link to share.
You’ll also want to update the affiliate link so it goes to your actual main registration page for the virtual summit:
7) Add Your Speakers to ThriveCart Learn
If you’ve offered your speakers a free VIP ticket, you’ll want to add them to Learn. You can either provide them with a 100% off coupon code to sign up themselves or add them directly to Learn by importing all speaker info in a CSV file.
8) Managing Your Virtual Summit in ThriveCart Learn
You have your virtual summit officially set up using ThriveCart and ThriveCart Learn!
But I wanted to touch on a few things to make managing the summit a little bit easier.
The first thing is to set reminders to publish/unpublish lessons each day of the summit or as needed for access limits for free ticket holders. This is the main reason why it’s better to create 2 different Learn products, as I shared in step one of this blog post. It means you won’t have to mess with the VIP Learn product, just the free ticket Learn product.
Another fun tip is to remember that you can embed anything into Learn – not just videos.
Want to embed questionnaires or feedback forms under each presentation? You can do that! I personally would embed an Airtable form for this.
Want to embed a chat box for each presentation? No problem!
Final Thoughts
I know that ThriveCart isn’t marketed as a virtual summit software solution, but it truly does work well for managing your entire event. If you’re planning on hosting a virtual summit in the future, don’t forget to grab my virtual event ThriveCart checkout and funnel template.
Need more in-depth tutorials or summit strategy? Be sure to check out this free masterclass from my friend and summit expert Krista Miller from Summit in a Box.
LEARN MORE ABOUT GOING FROM SUMMIT TO SALES

Other posts you may want to check out:
- ThriveCart and Encharge Integration Explained: Pros, Cons, and Real Talk
- What is a VSL Funnel & How to Build One in Thrivecart
- 6 Simple Ways to Improve Your Order Confirmation Page in Thrivecart
- Is Your Subscription Membership About To Violate Federal Law?
- Recurring Revenue Businesses: The Pros and Cons of This Business Model